How to perform PO Matching?
How to perform PO Matching? 
PO Matching is to match PO to a particular month in the future for accounting purposes when a cut-off date is defined in setup. The cut-off date refers to the last day of a month in which financial transactions are taken into accounts for the month. When the invoice arrives after the cut-off date, the user can match the PO to the invoice and assign it to a future month. This is usually done by the Procurement Manager or Facility Manager. The same can also apply to PO Variance.
To perform PO matching
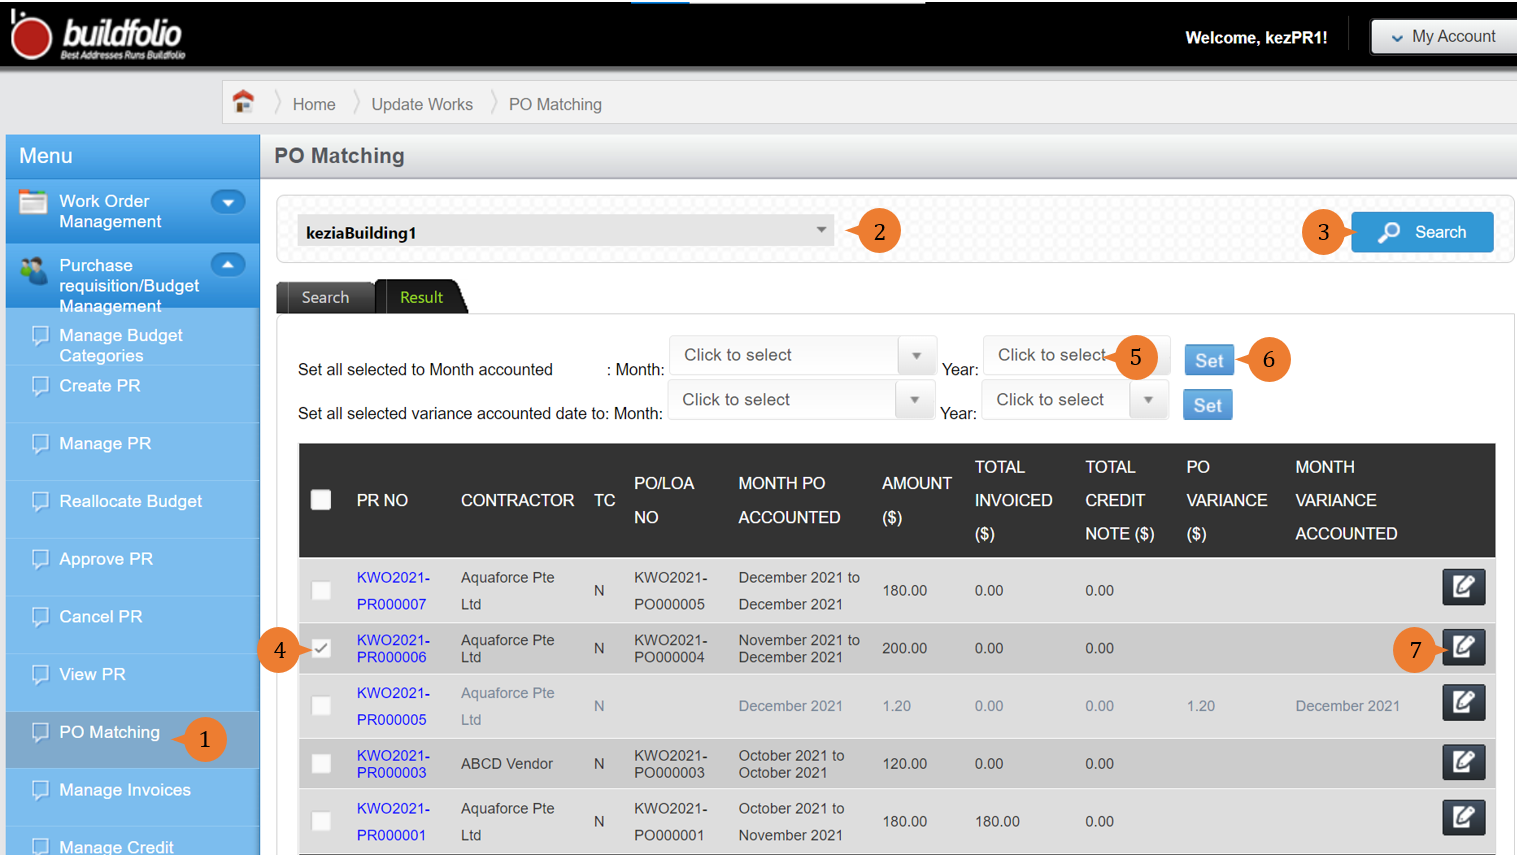
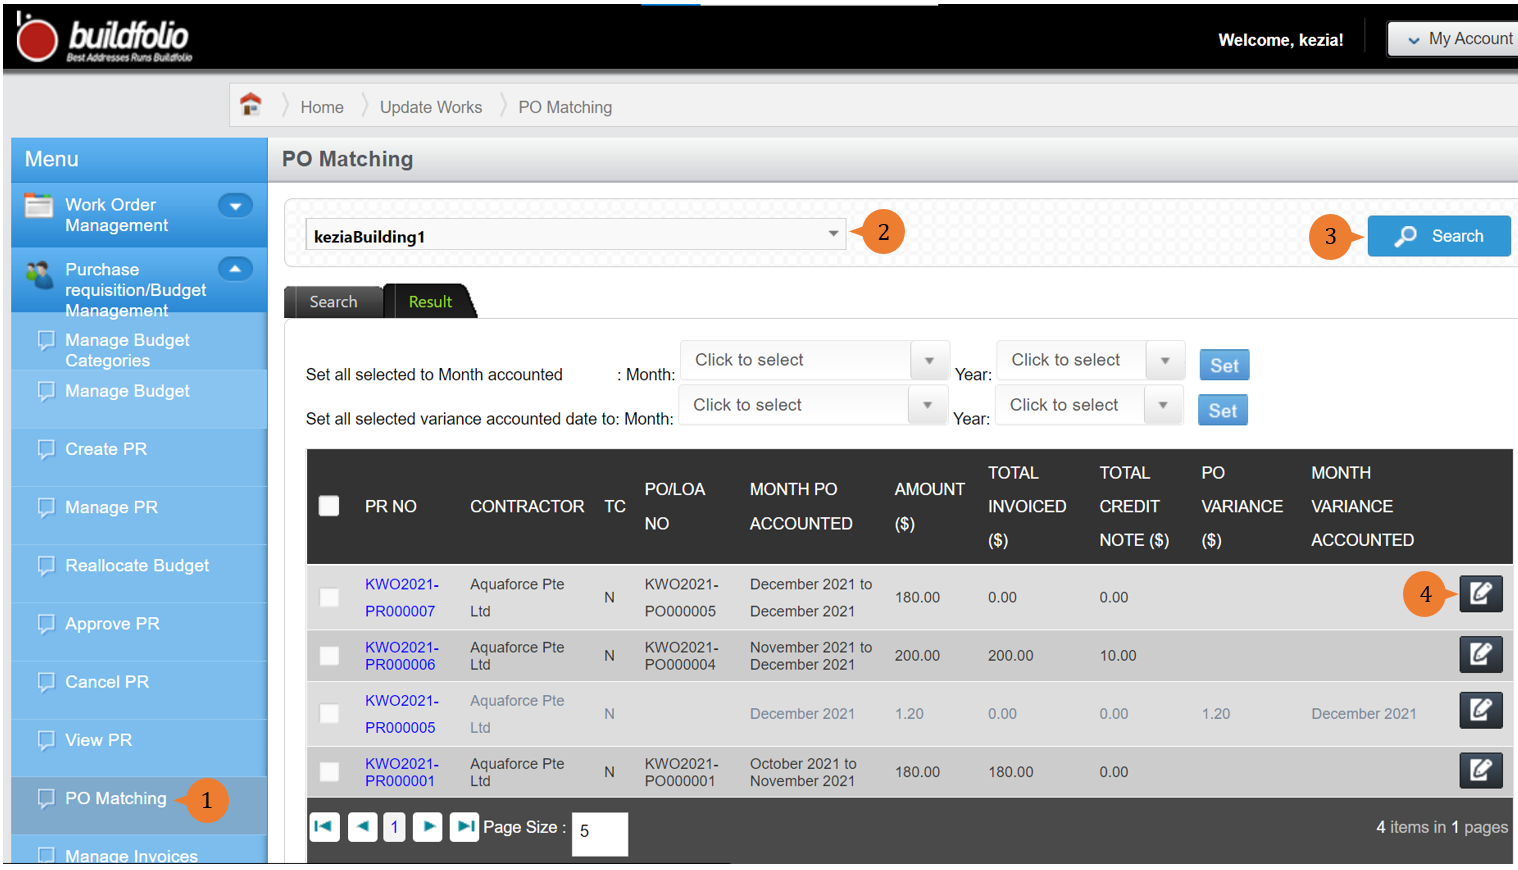
- Select PO Matching under Purchase requisition/Budget Management from the Menu.
- Select the location.
- Click on the Search button for the list of PR to be listed out in the table.
- Select the PR entry by ticking on the checkbox.
- Select the Month and Year.
- Click Set to enable the change.
- To input the invoice data, click the Edit button for the desired PO.
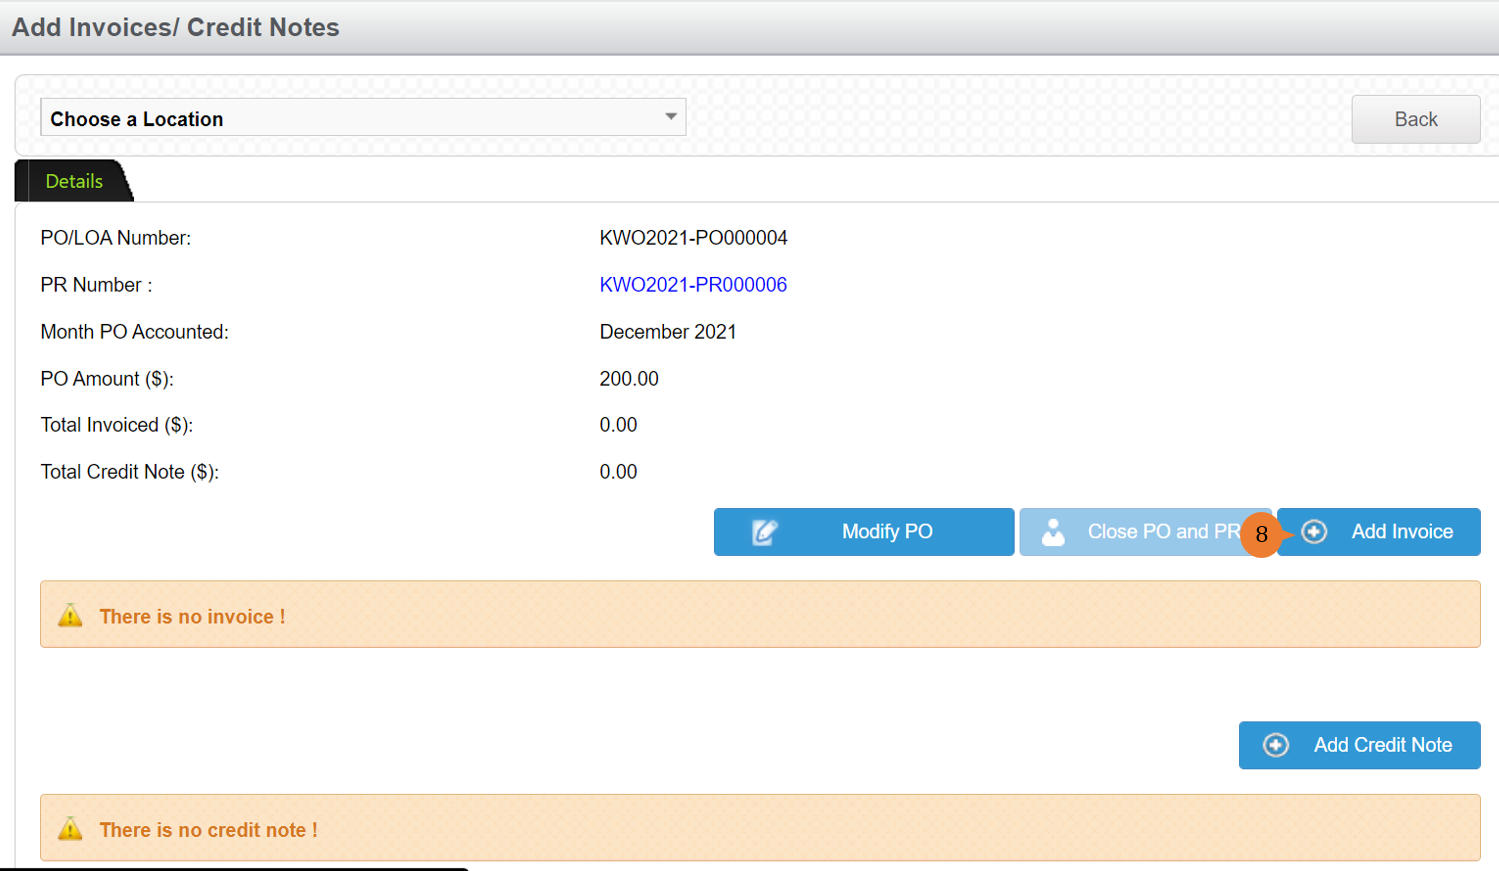
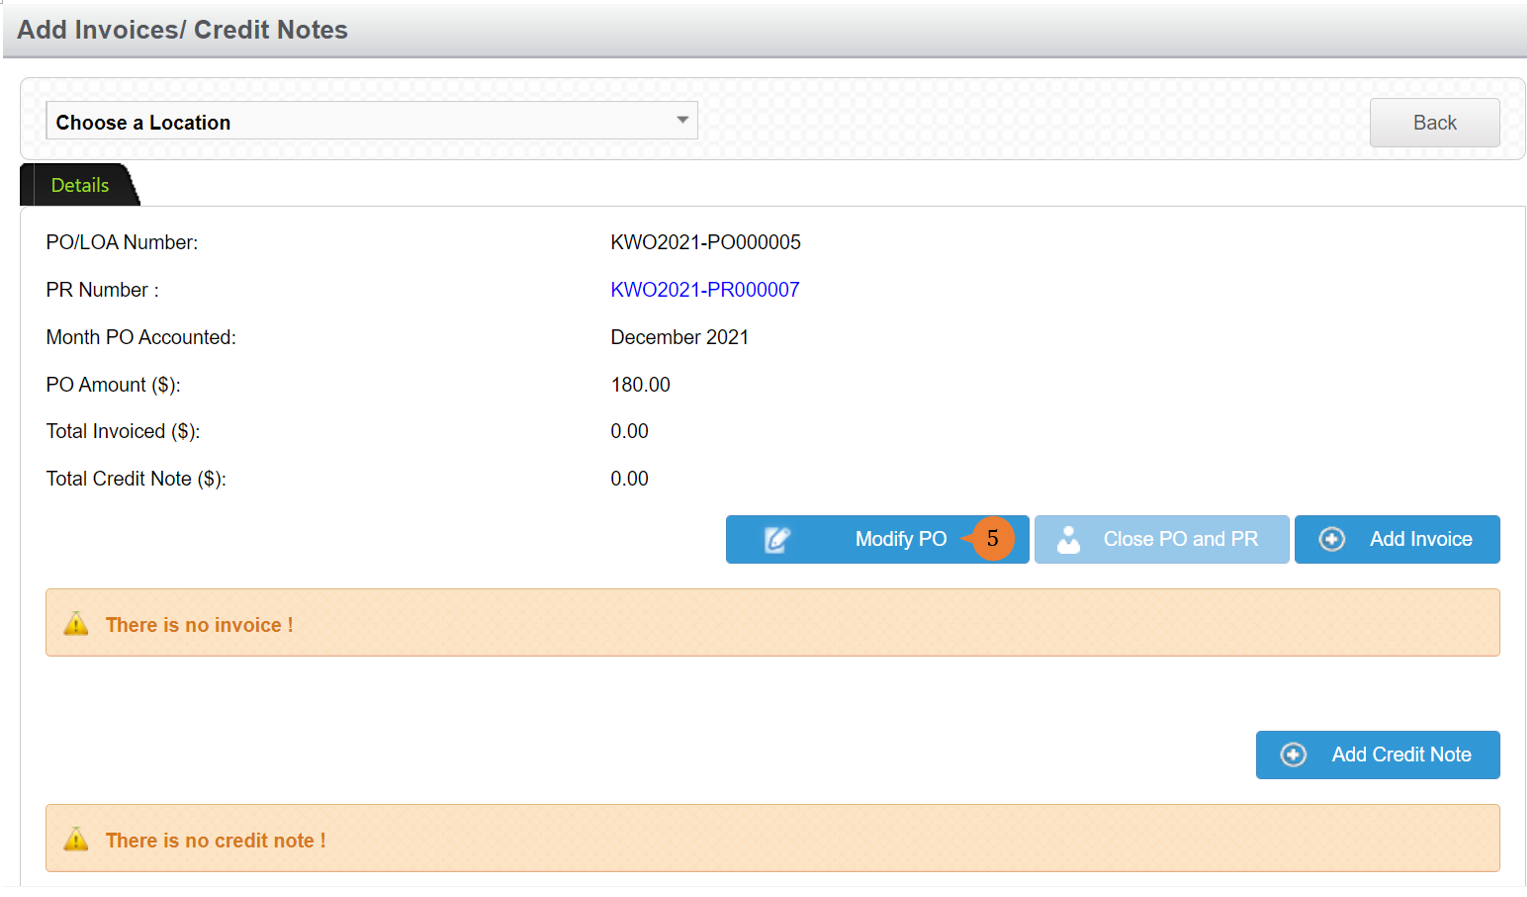
- To add an invoice, click on the Add Invoice button.
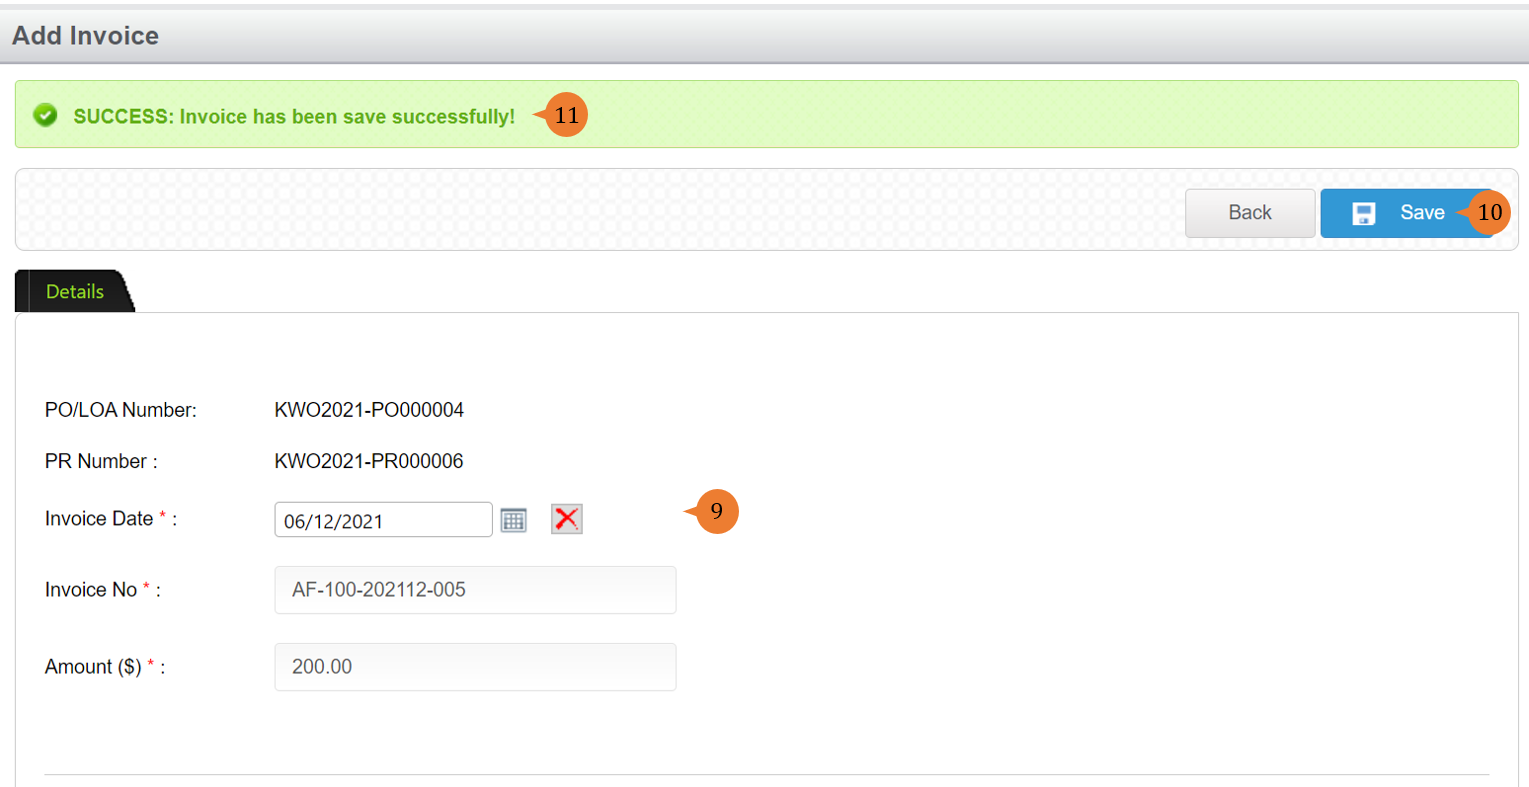
- Input all the information in the * fields.
- Click on the Save button to add the invoice record to the PR.
- When the invoice is successfully saved, a success message will appear below the page title
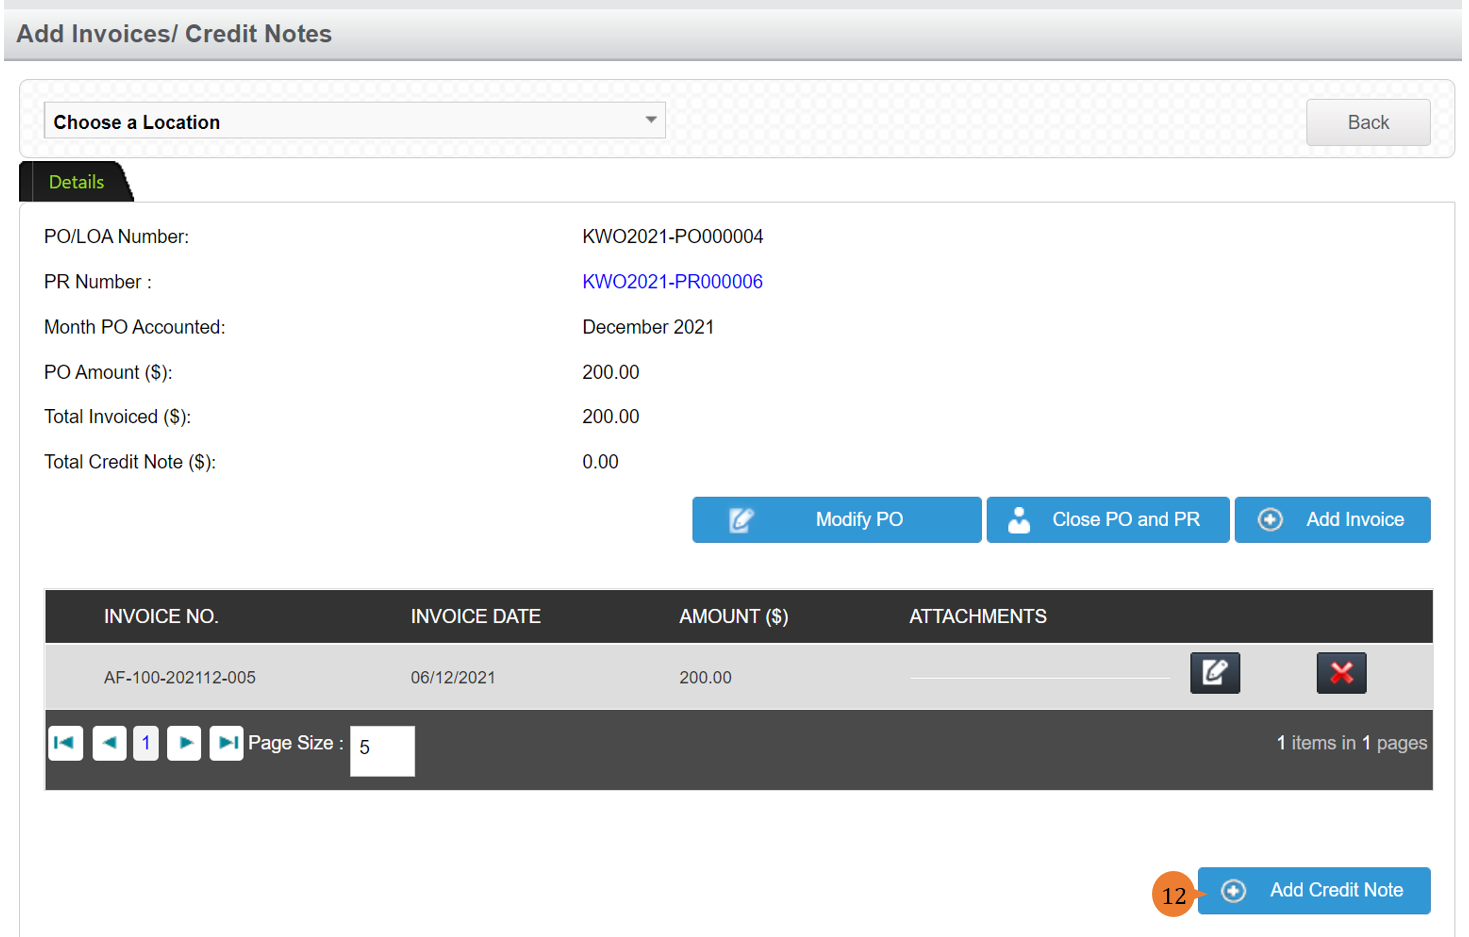
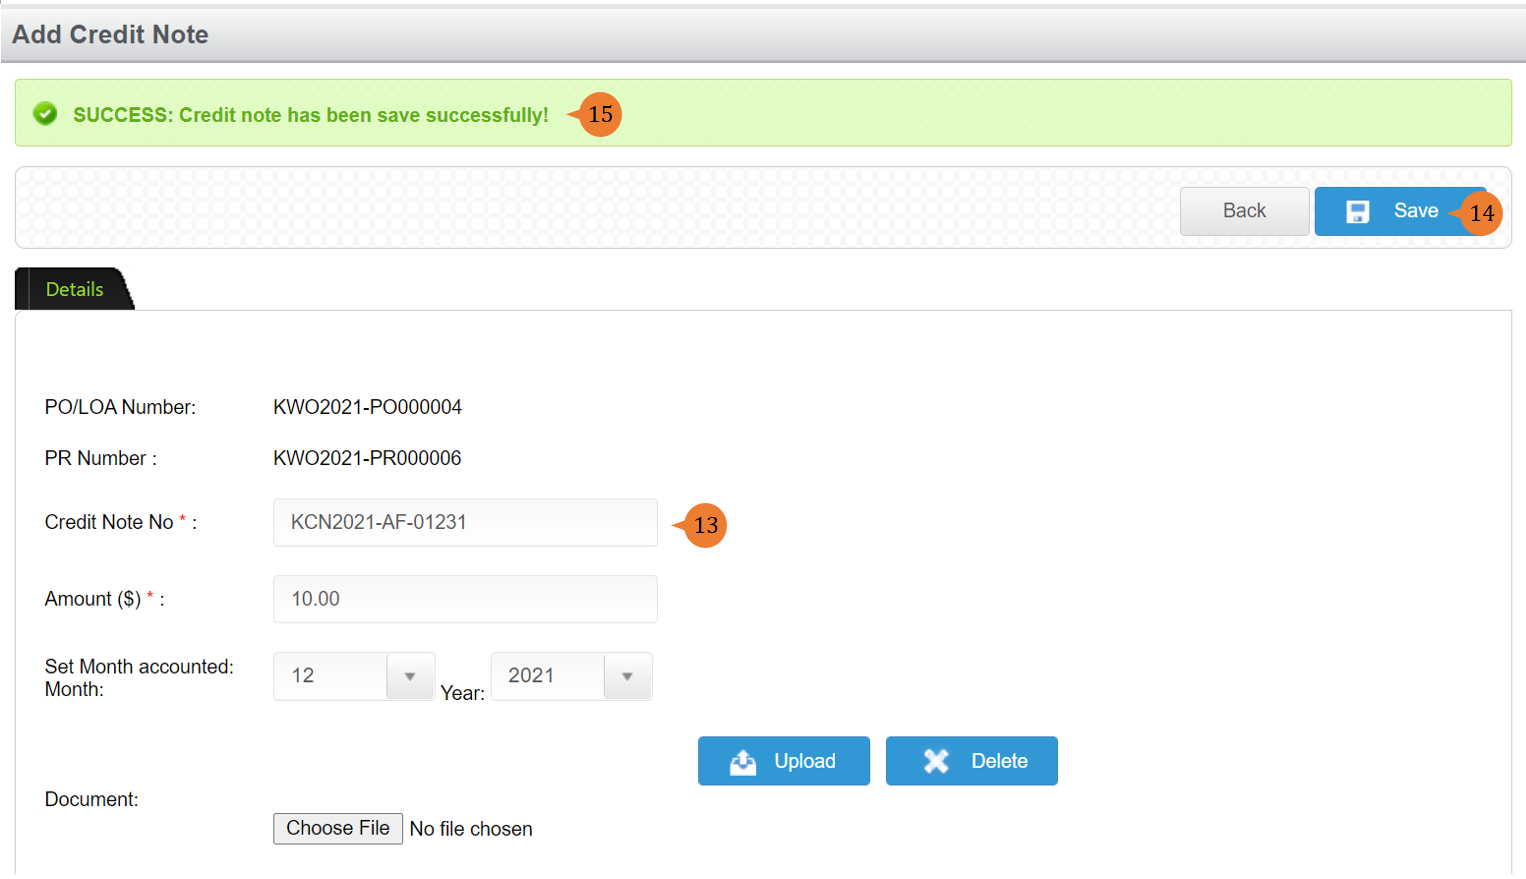
- In case, the delivered quantity or service costs less in actuality than the invoice amount, the Vendor will provide a credit note, and add this by clicking the Add Credit Note button.
- Input all the information in the * fields.
- Click on the Save button to add the credit note record to the PR.
- When the credit note is successfully saved, a success message will appear below the page title
How to Modify PO?
The procurement department will be able to modify PO to cater for any changes in quantity or/and cost of the original PO which will create a PO Variance. Depending on the company’s procurement policy whether approval needs to be obtained for such changes.
Modifying PO will only be possible if there is no Invoice and Credit Note created.
To perform Modify PO
- Select PO Matching under Purchase requisition/Budget Management from the Menu.
- Select the location.
- Click on the Search button for the list of PR to be listed out in the table.
- Select the PR entry and click on the Edit button.
- To modify PO, click on the Modify PO button.
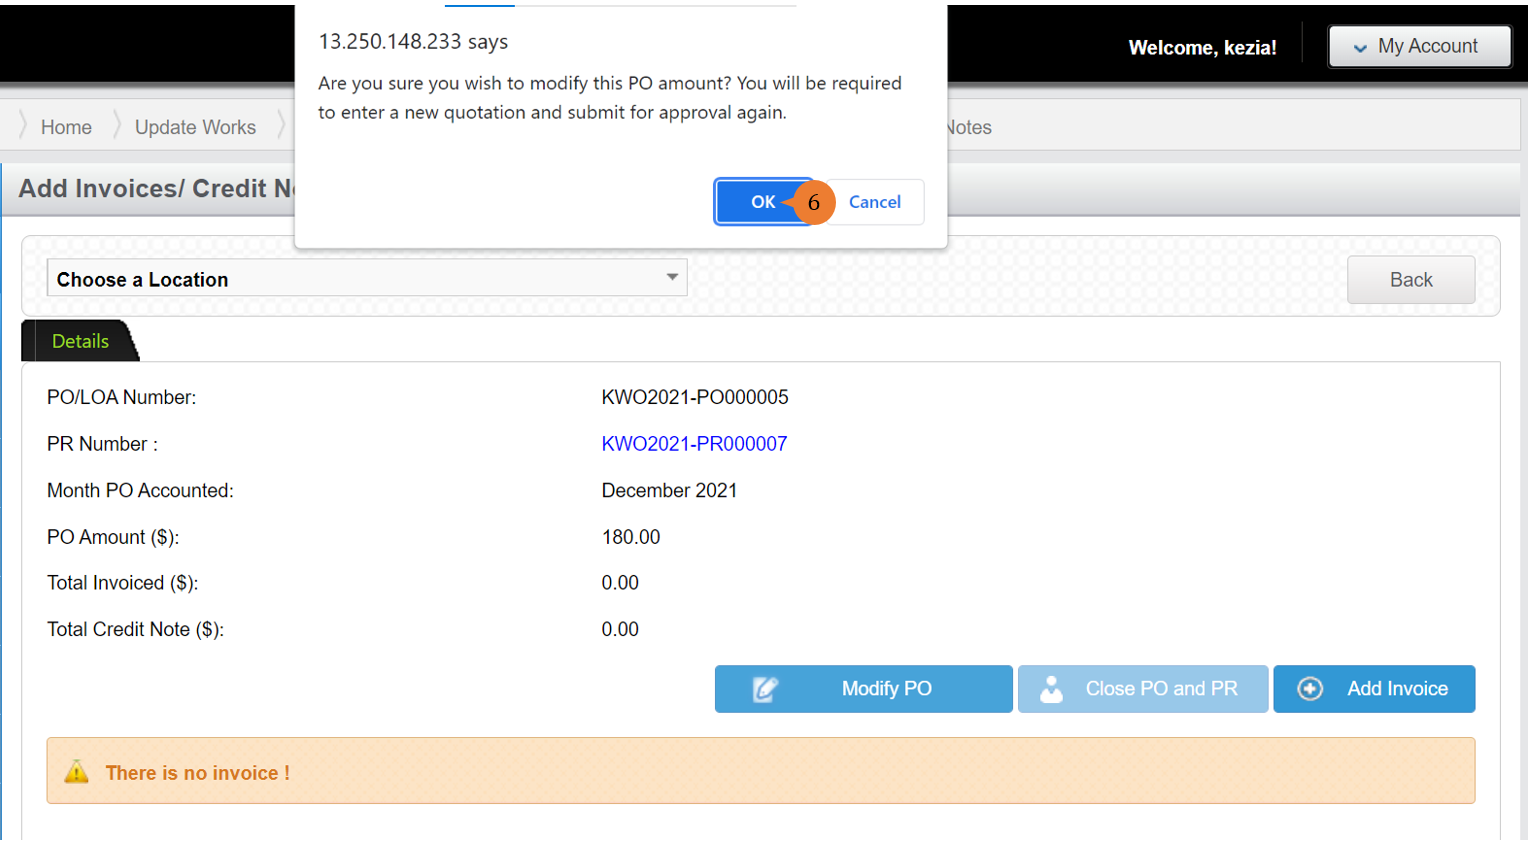
- A message prompt will pop up to confirm whether you would like to modify the PO, to proceed click OK.
- If it is to amend the cost for the PO variance, go to the Quotations tab.
- Click on the Edit button on the selected quotation.
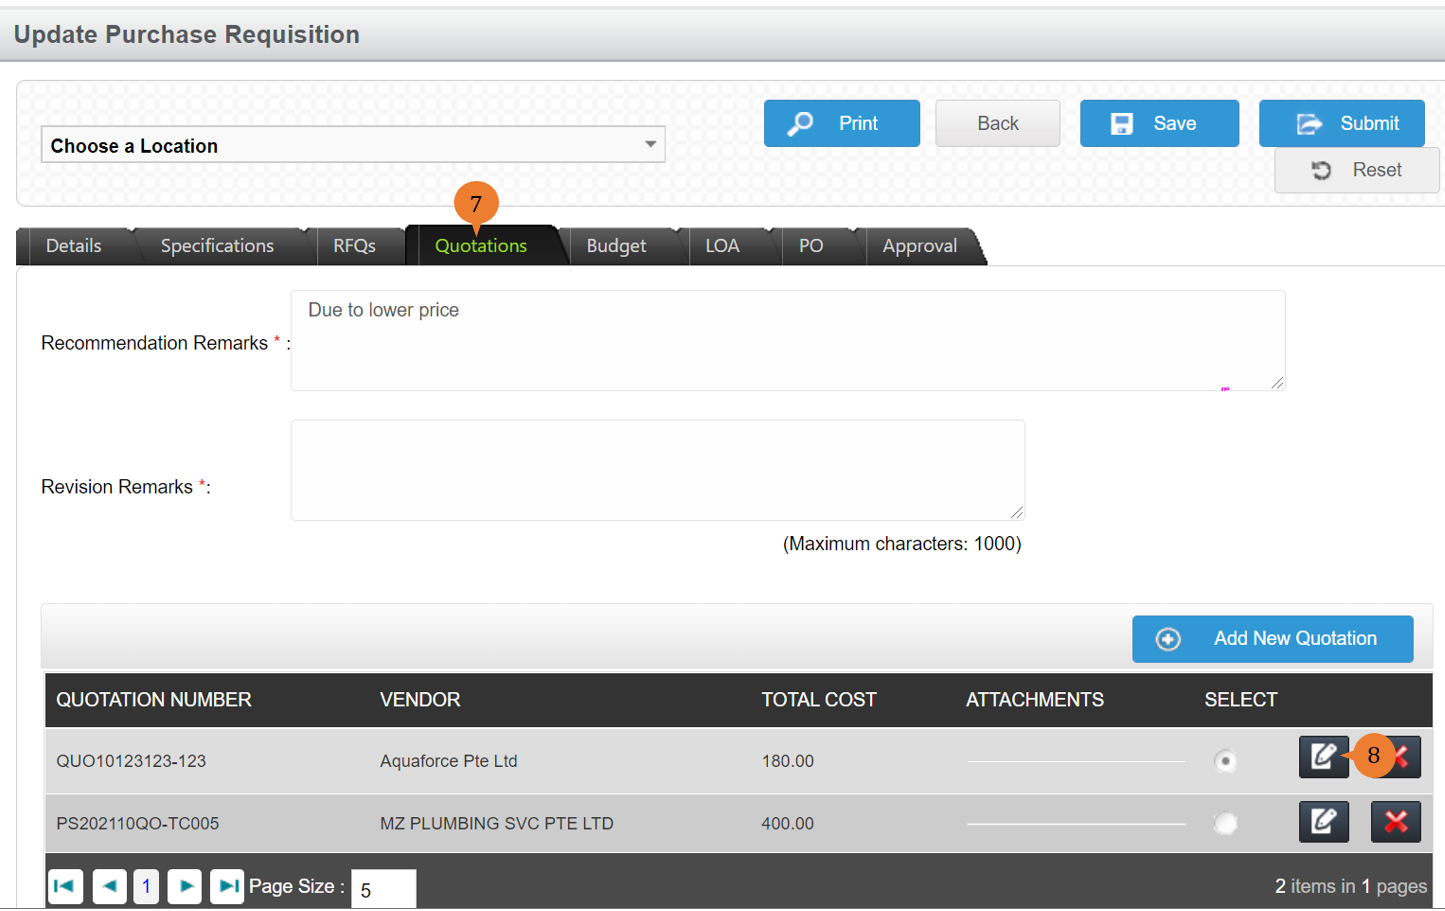
- Make the necessary amendments and click the Save button.
- When the quotation is successfully amended, a success message will appear below the page title.
- Click on the Back button to go back to the PO.

- If it is to amend the quantity for the PO variance, go to the Specifications tab.
- Click on the Edit button of the inventory item.
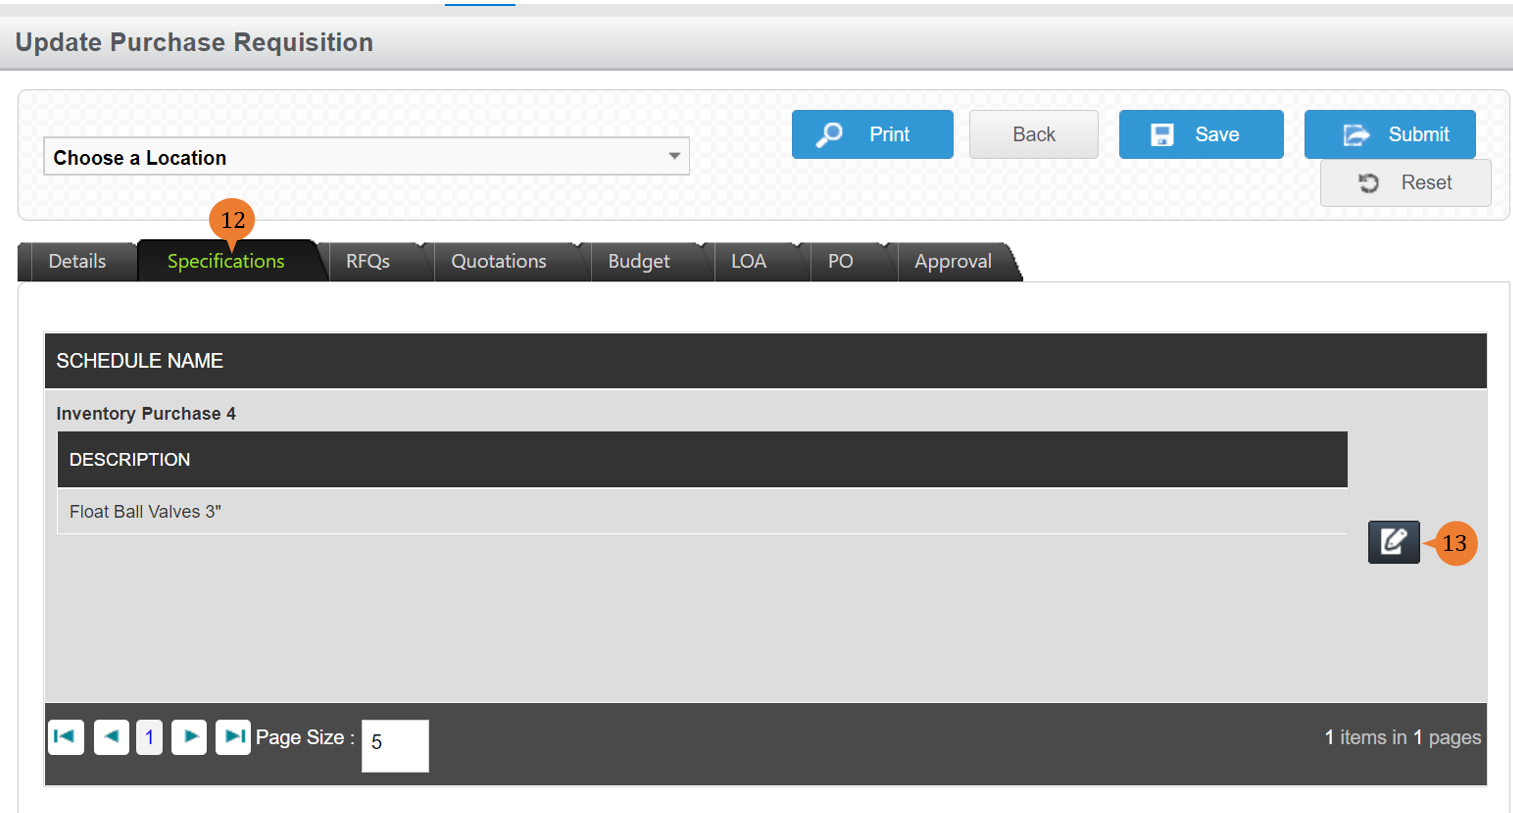
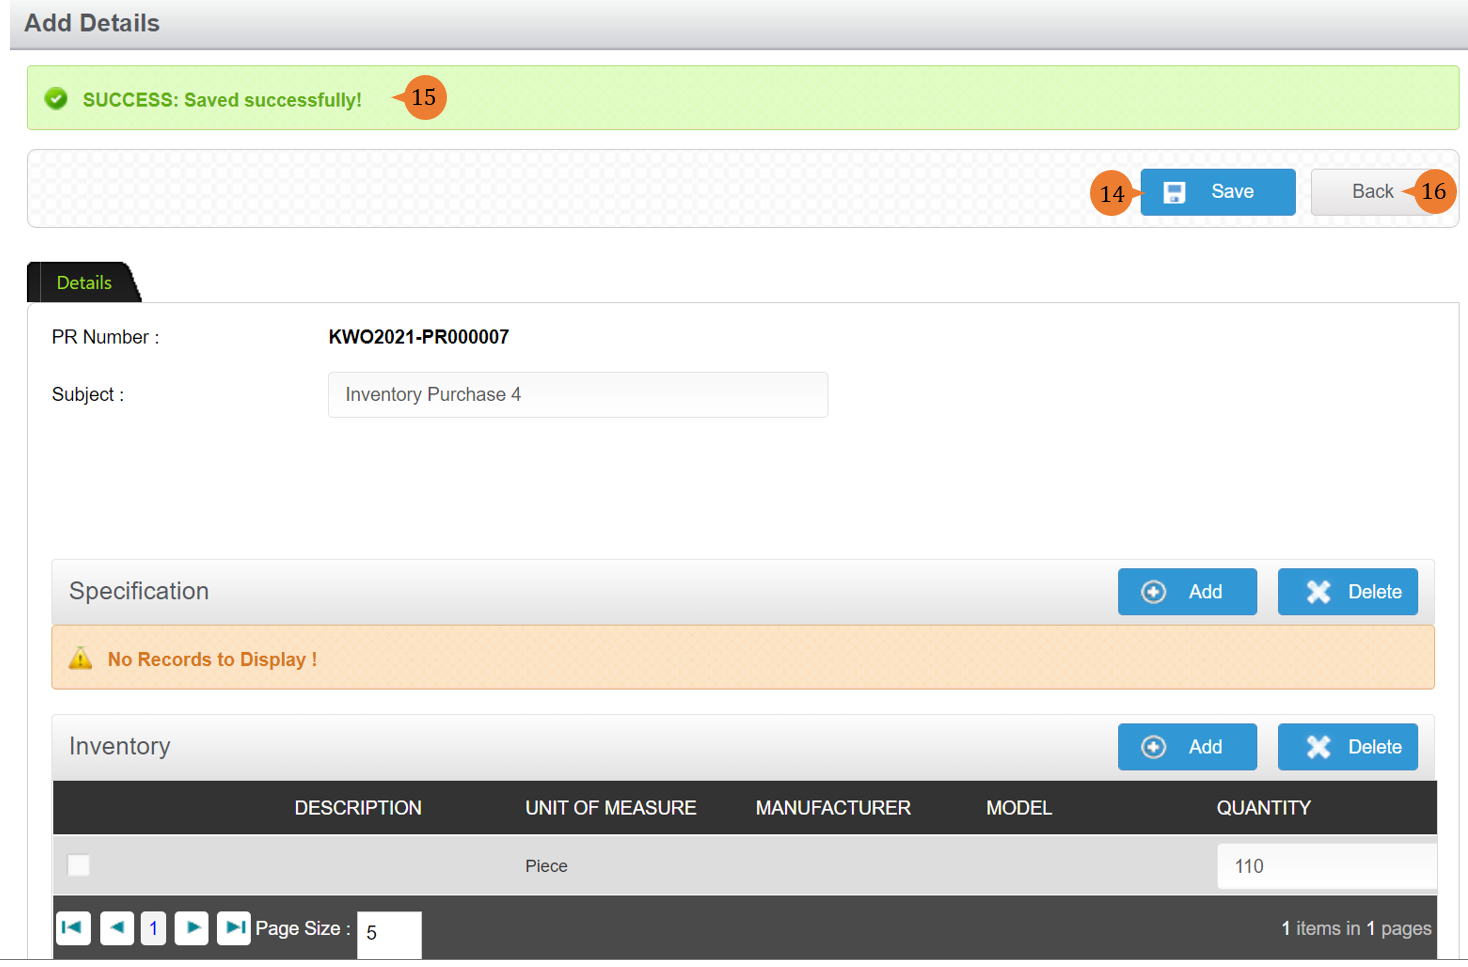
- Make the necessary amendments and click the Save button.
- When the inventory is successfully amended, a success message will appear below the page title
- Click on the Back button to go back to the PO.
- Once all the amendments are made for the PO, click the Submit button.
- A message pop up will appear for the budget consumption, to proceed click OK.
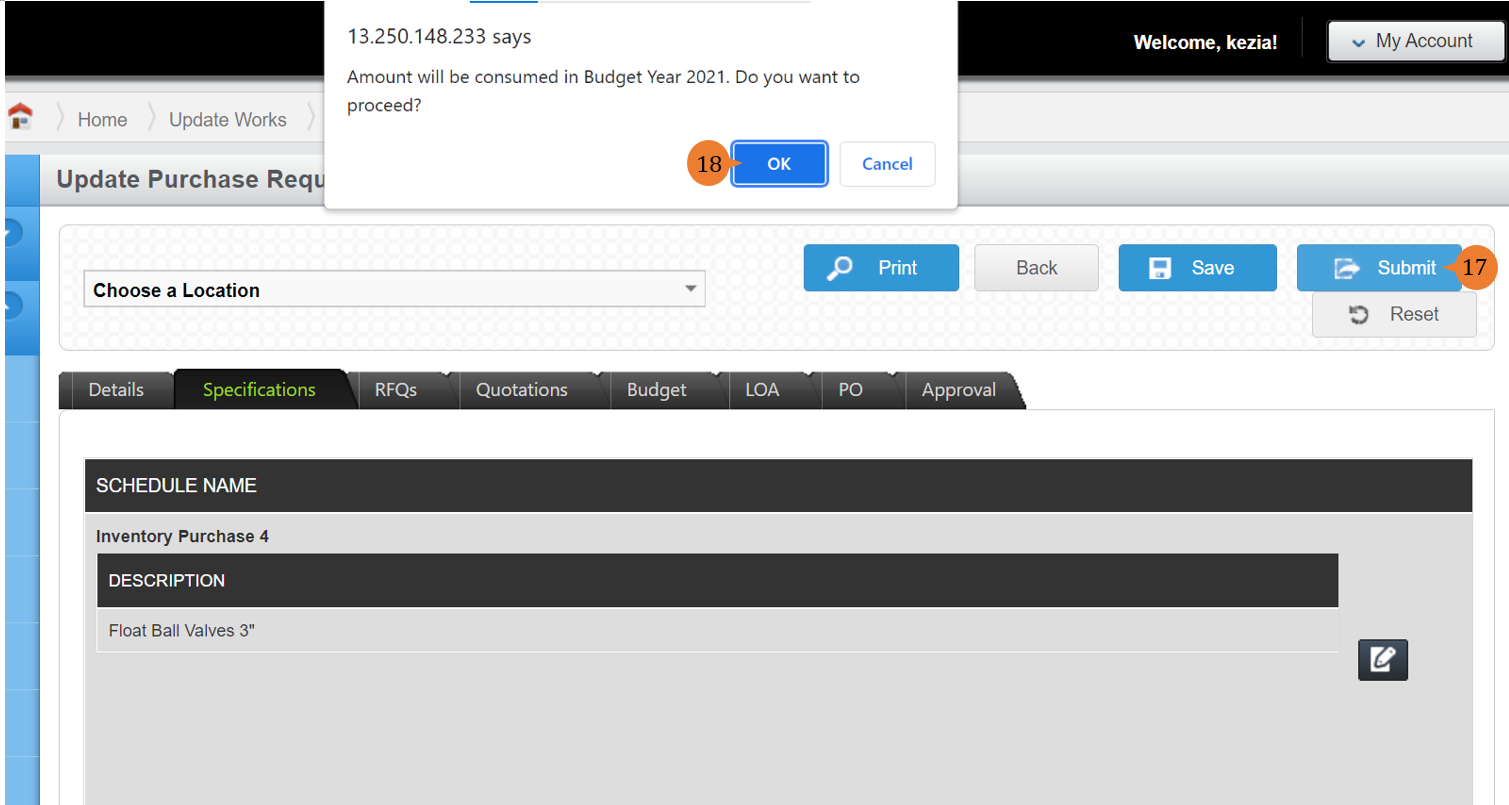
- When the PO is successfully modified, a success message will appear below the page title.

More on this topic
- For step-by-step guides to using Purchase Requisition/Budget Management module, see Purchase Requisition/Budget Management Module.