Generating Checkin History Report
How to generate the check-in history report?
Check-In History Report will list out all the check-in movements of the various stock in the store or warehouse. This report is useful for both the procurement department and the facility manager.
To generate the check-in history report
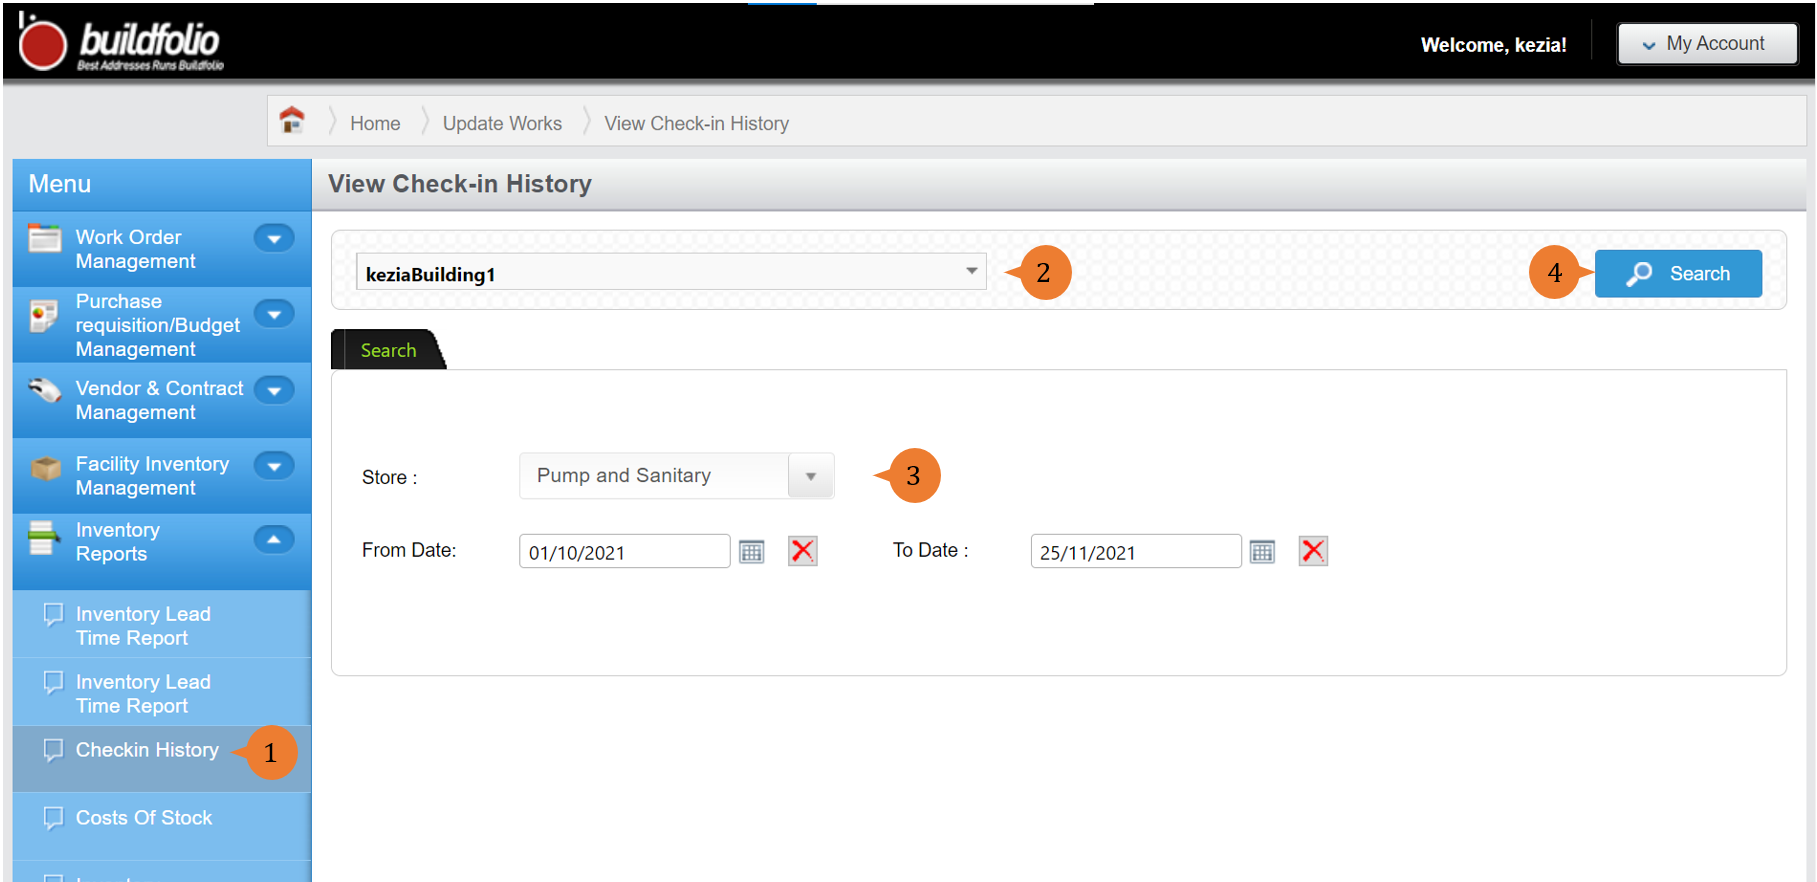
- Select Checkin History under Inventory Reports from the Menu.
- Select the location that you wish to search the check-in history report for.
- Select the Store and date range to filter the list of results.
- Click on the Search button.
- A new tab will appear that contains the check-in history report based on the store and date range selected.
- The report will entail the following:
- Checkin ID – An unique identifier code for each stock movement
- Store Name – Name of the store where the inventory items are being located at.
- Bin Name – Name of the bin in the store where the inventory items are being located at.
- DateChecked In – The date and time that the inventory items are check-in into the store.
- CheckedInBy – The user that performs the check-in action.
- PO No – The inventory items are being check-in by this Purchase Order (PO) number.
- Remarks – Remarks indicated during the check-in.
- Stock Code – The inventory stock code number that is being check-in.
- Stock Item – The inventory item name that is being check-in.
- Stock Description – The inventory item description that is being check-in.
- Checkin Quantity – The total number of inventory items being check-in.
- Unit Price – The unit price for the inventory items being check-in.
- Total Amount – The amount for these inventory items transactions.

More on this topic 
- For step-by-step guides to using the Inventory Reports module, see Inventory Reports Module.