How to Add and Start a new Schedule
How to Add a Schedule?
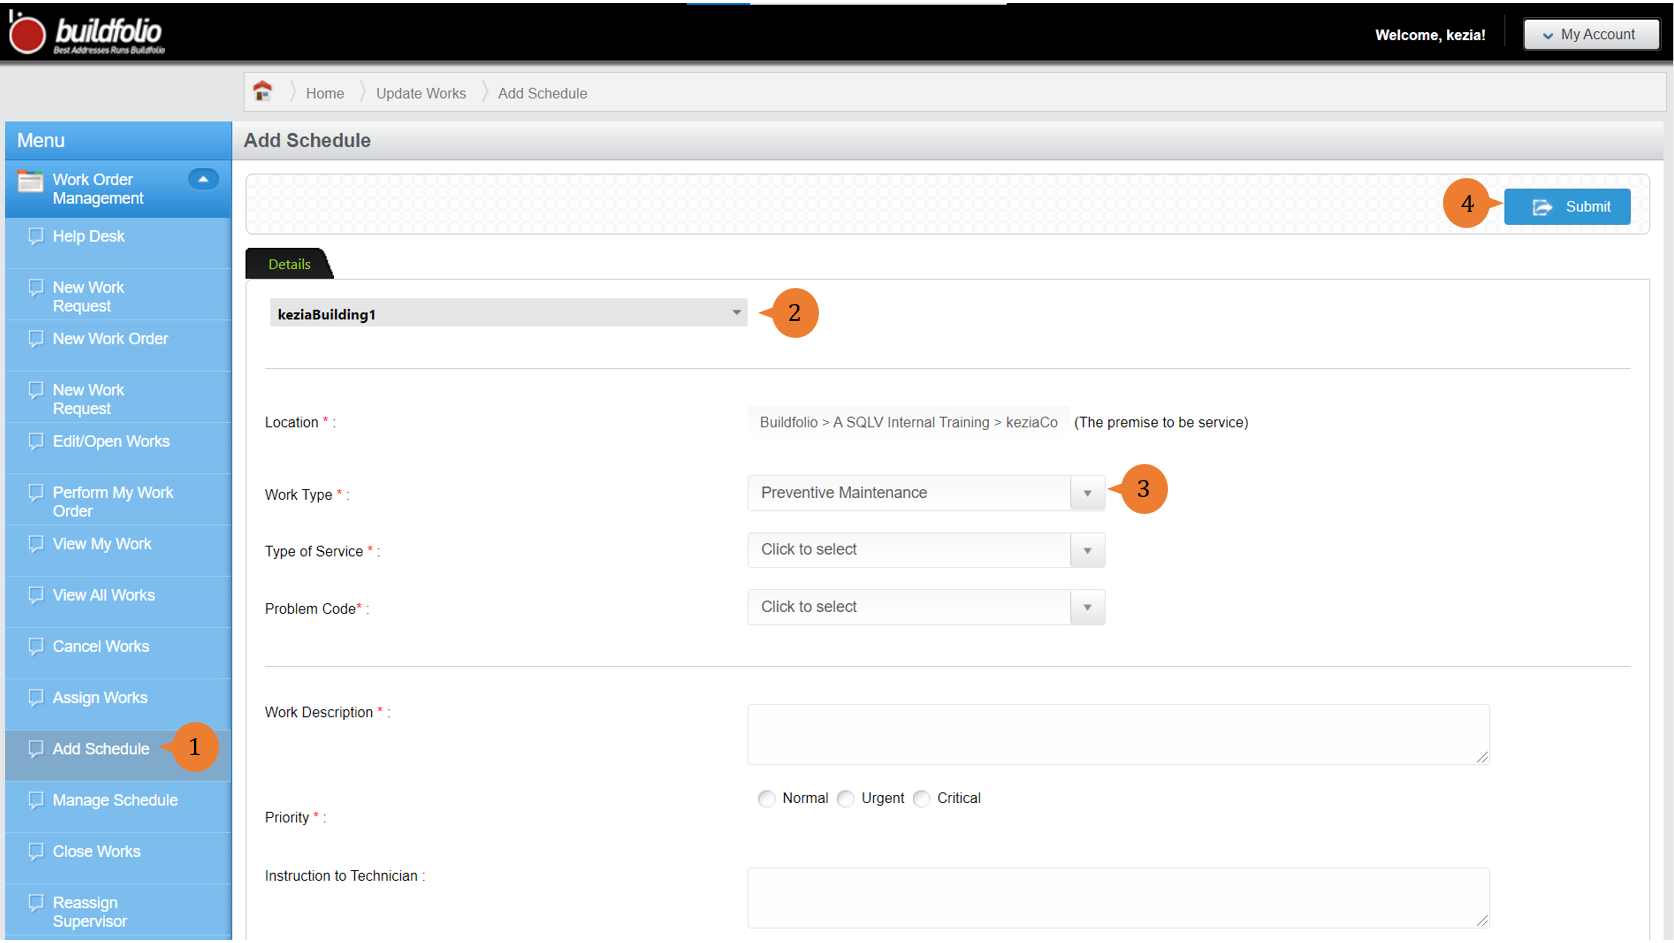
To Add a new Schedule
- Select Add Schedule under Work Order Management module from the menu.
- Select a Location from the Location tree and fill in the compulsory fields marked with *.
- For Work Type, select Preventive Maintenance when creating Schedules.
- To create the new schedule, select Submit. This will lead you to the Plan Schedule page.
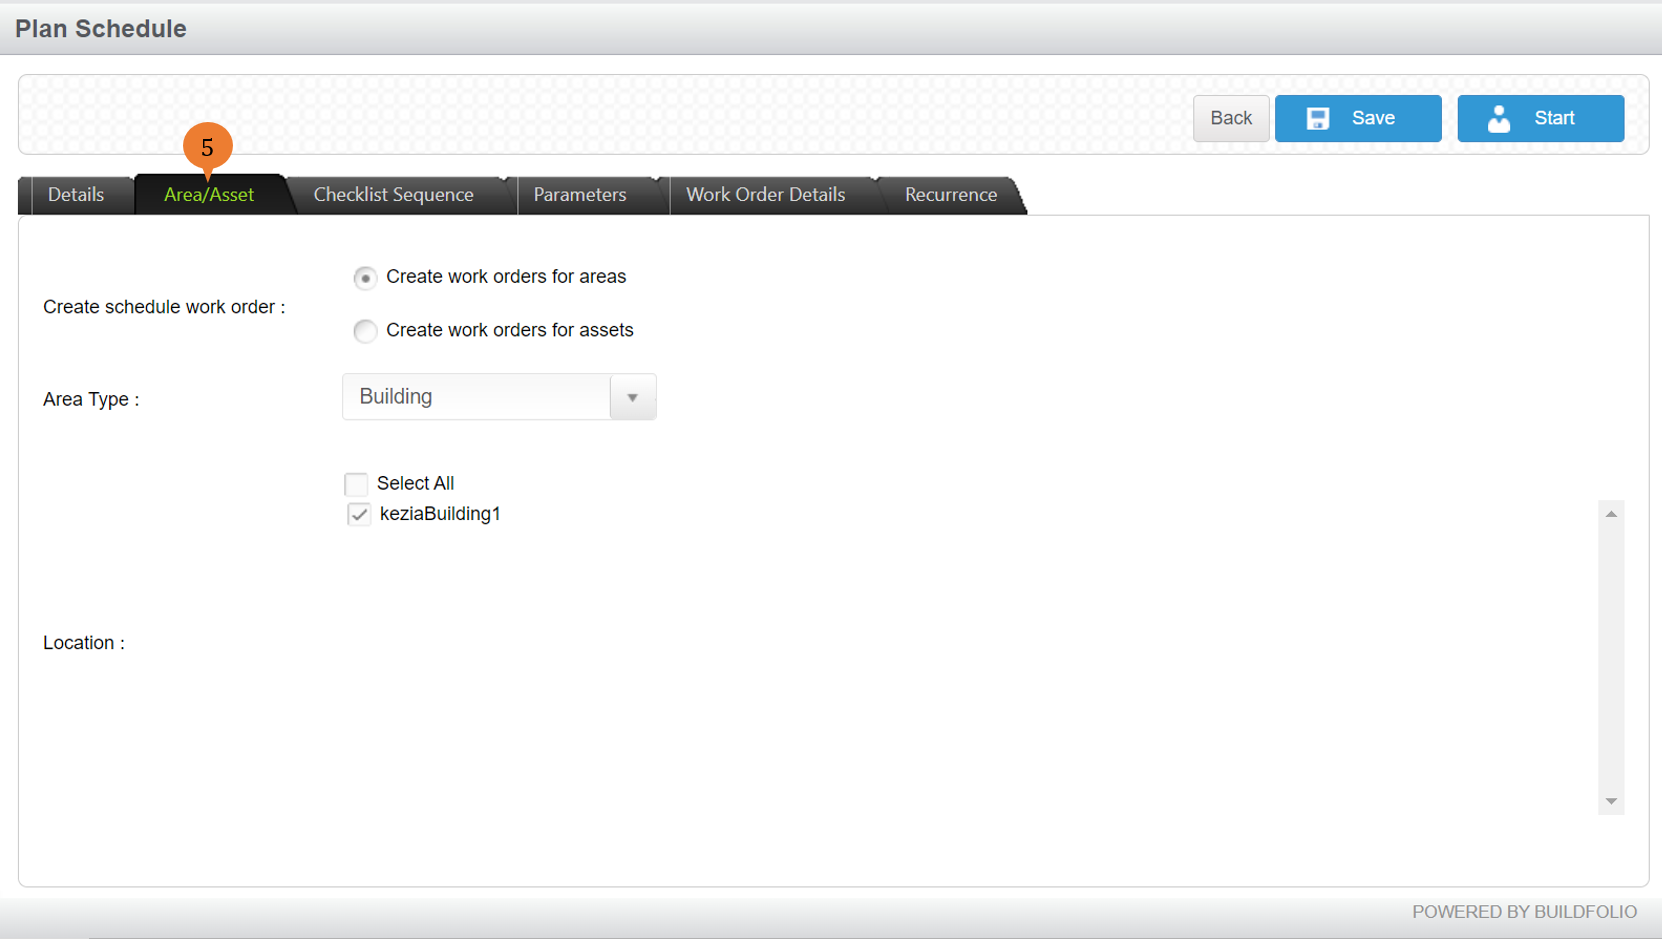
- Under the Area/Asset tab, indicate whether the preventive schedules are created for assets or areas. Fill in the necessary details.
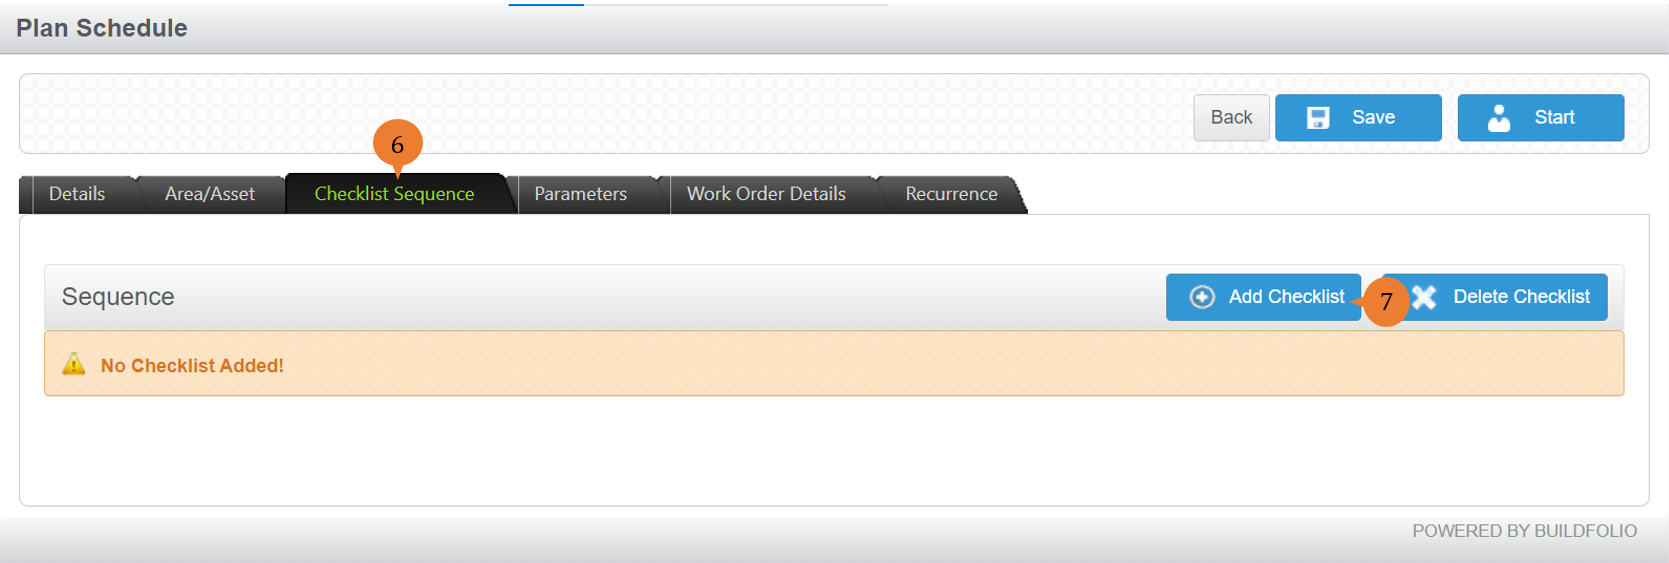
- Select the Checklist Sequence tab.
- To create a checklist for this preventive schedule, click on Add Checklist button.
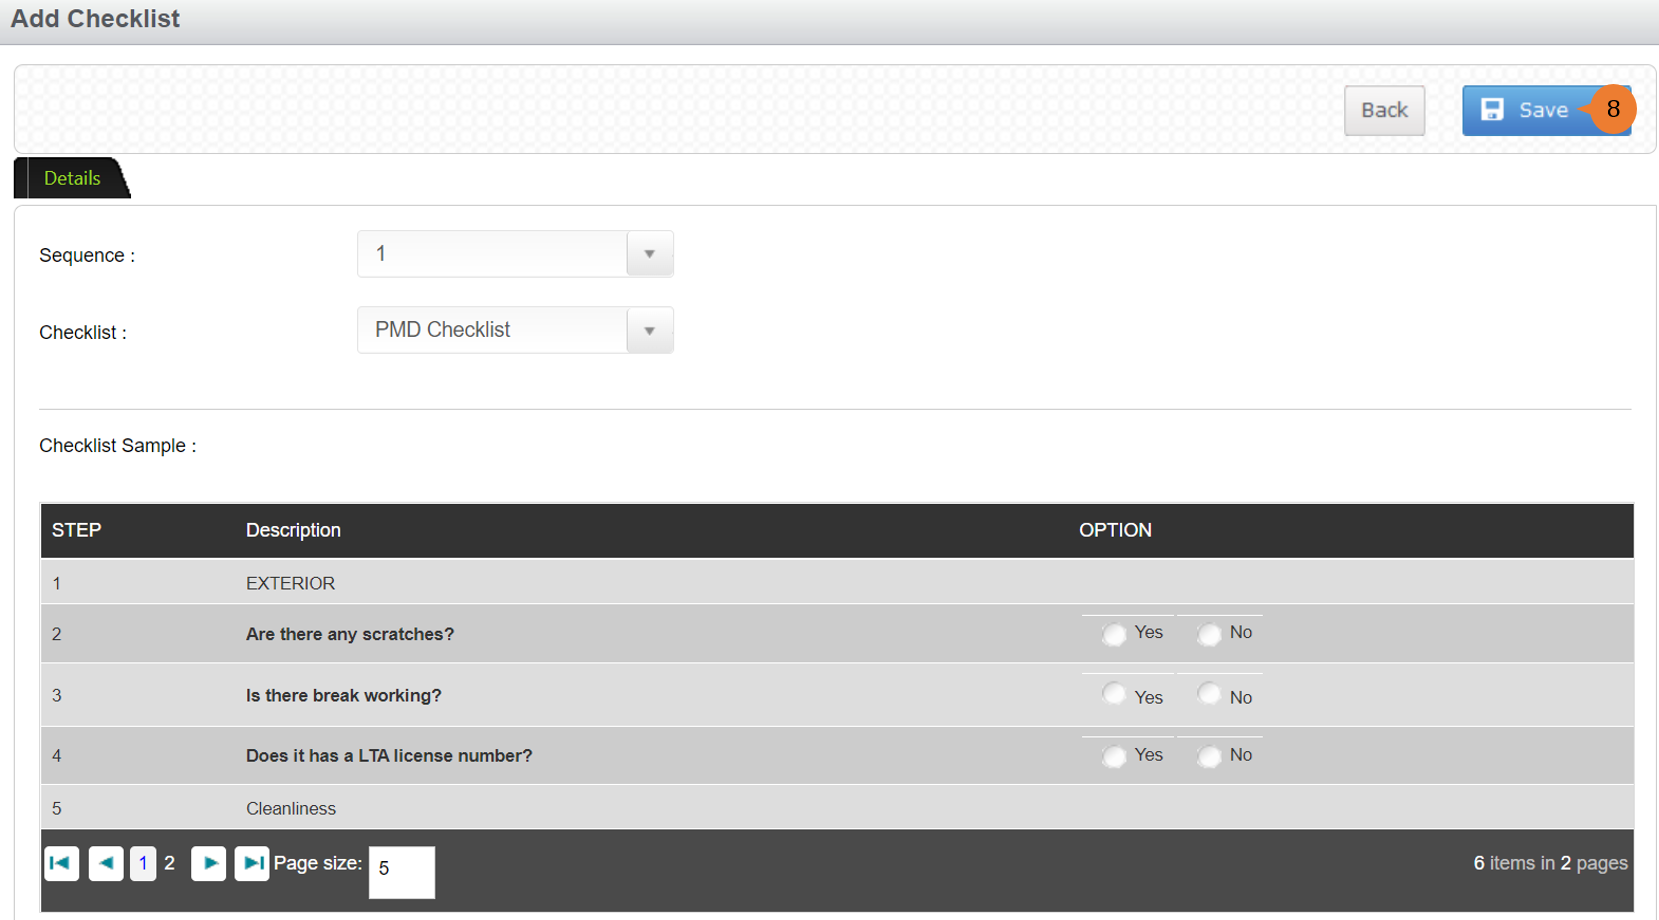
- Select the respective checklist and sequence for this preventive schedule. Click on the Save button once done.
- Select the Work Order Details tab.
- To set the duration of the schedule, fill in the Work Start and End Date/Time.
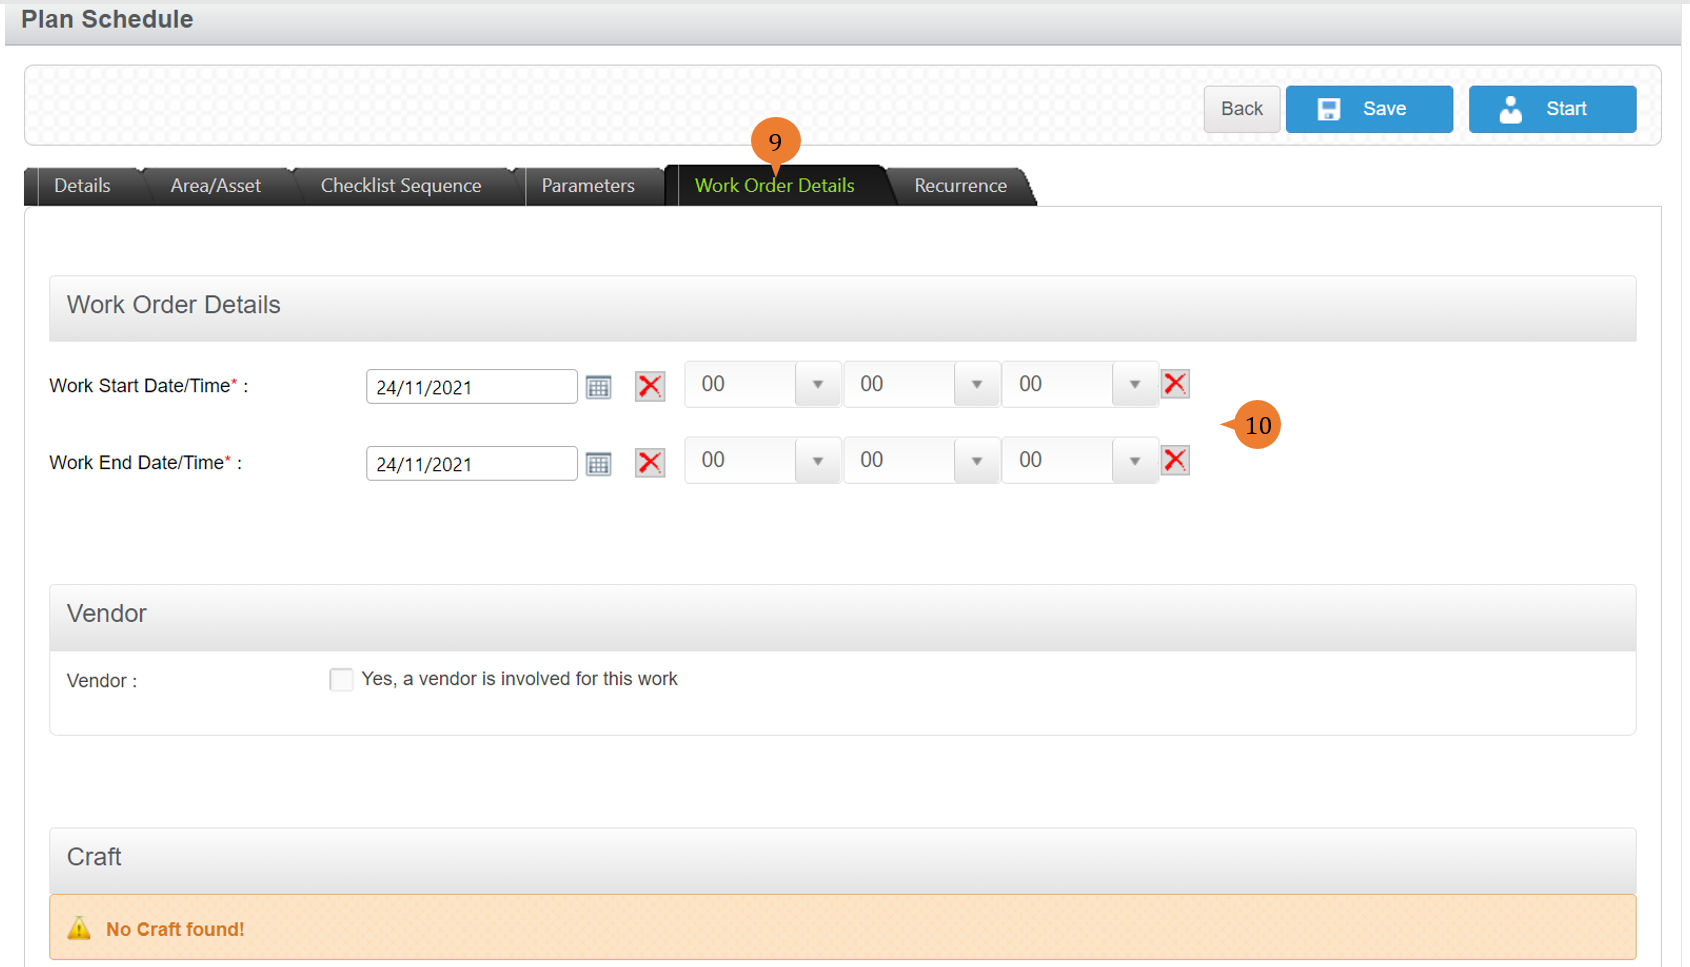
-
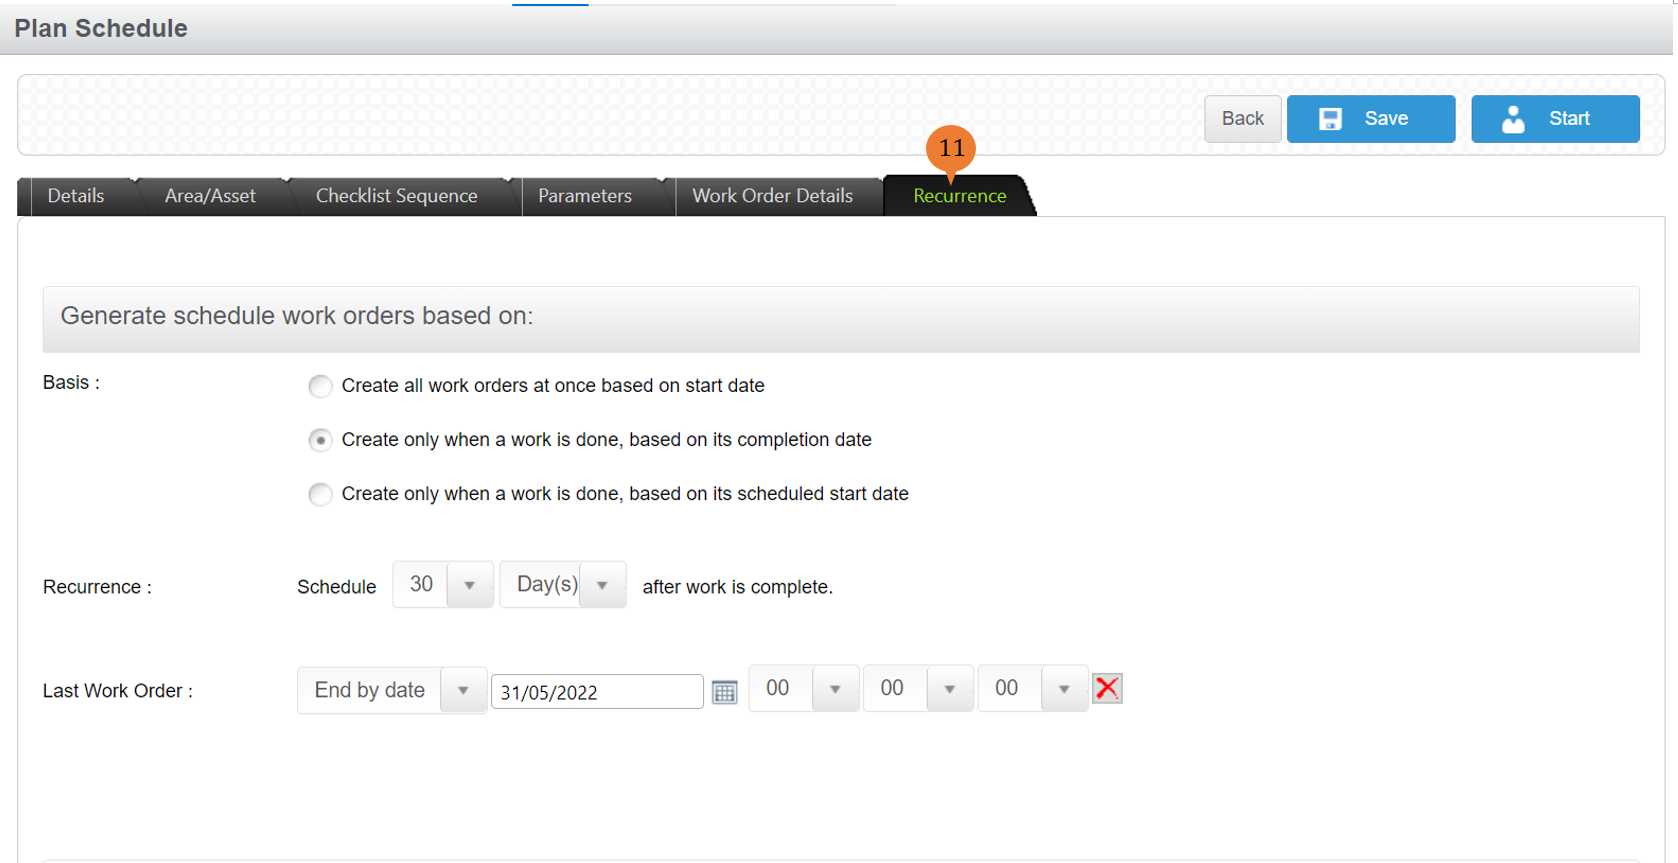
- Under the Recurrence tab, to set the frequency of the preventive maintenance scheduled, select your preferences for how subsequent Work Orders will be created.
- To create all work orders at once based on the start date basis, this will create all the scheduled work orders till the last work order date input.
- To create only when a work is done, based on its completion date basis, will only create the next schedule work order only when the previous work order date has been completed. The new schedule work order date will be created based on the date that the work order has been completed plus recurrence.
- To create only when a work is done, based on its schedule start date basis, will only create the next schedule work order only when the previous work order date has been completed. The new schedule work order date will be created based on the scheduled start date plus recurrence.
- To save the details entered, select Save. When the details are successfully saved, a success message will appear below the page title.
- To Start this schedule immediately, select Start.

How to Start a Schedule?

To start a schedule that was created on another occasion
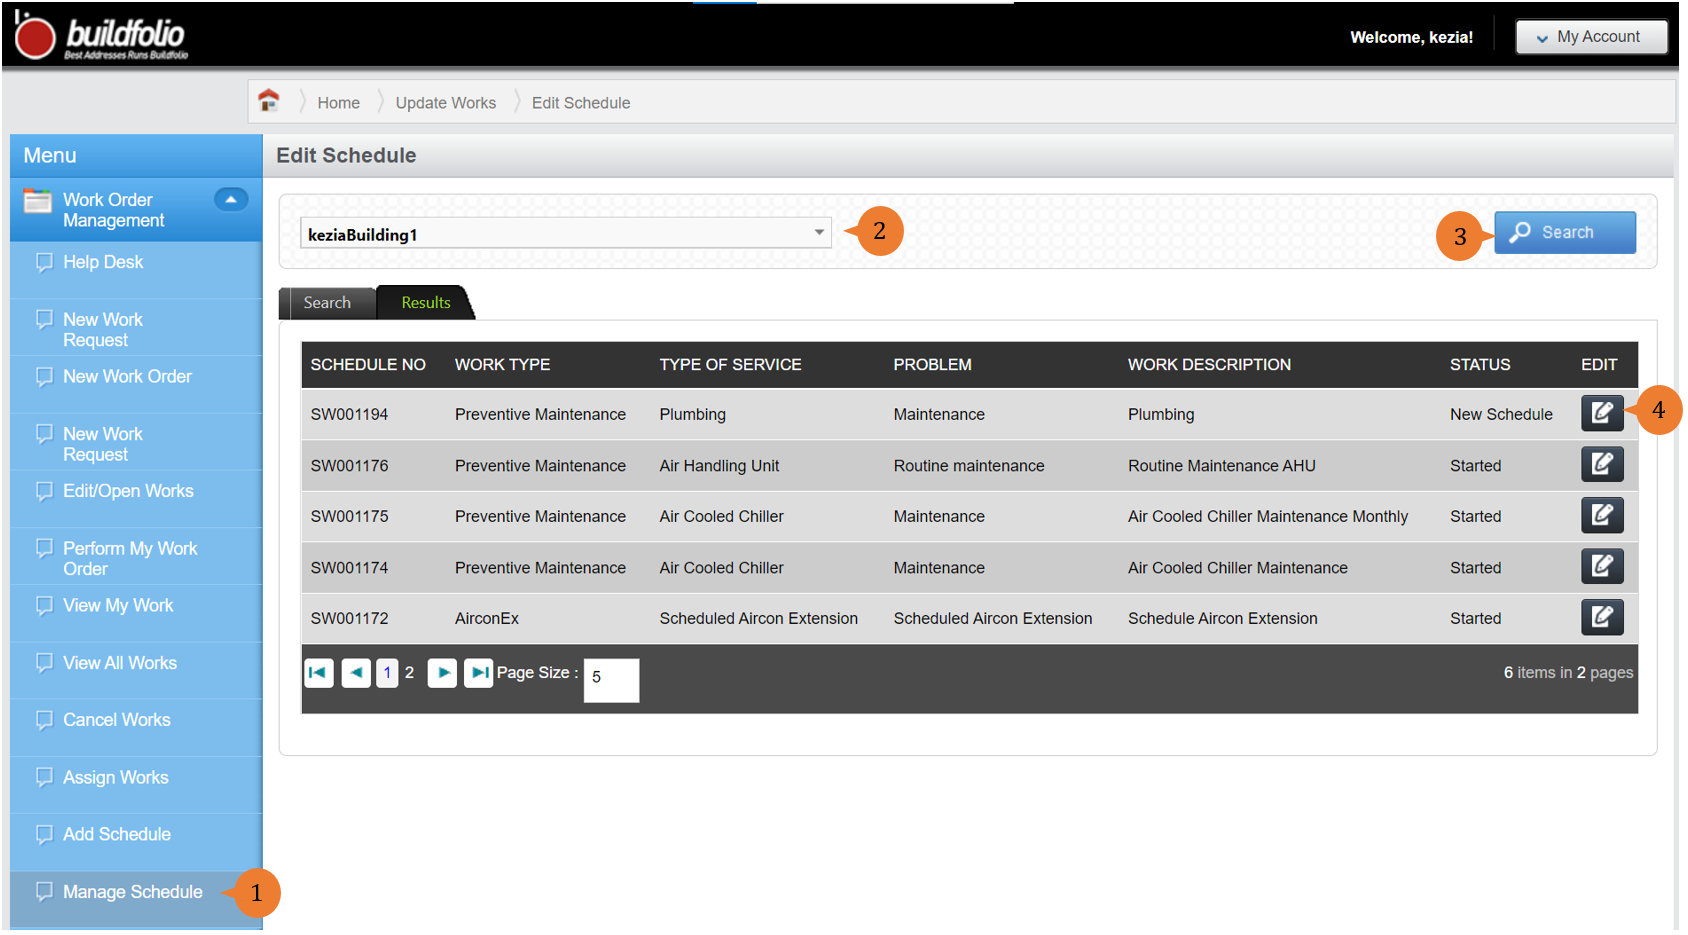
- Select Manage Schedule under Work Order Management module from the menu.
- Select a Location from the location tree.
- Click on Search. All Schedules under this location will be displayed.
- For the Schedule, you wish to Start, select the Edit icon.
- To Start the Schedule, select Start.
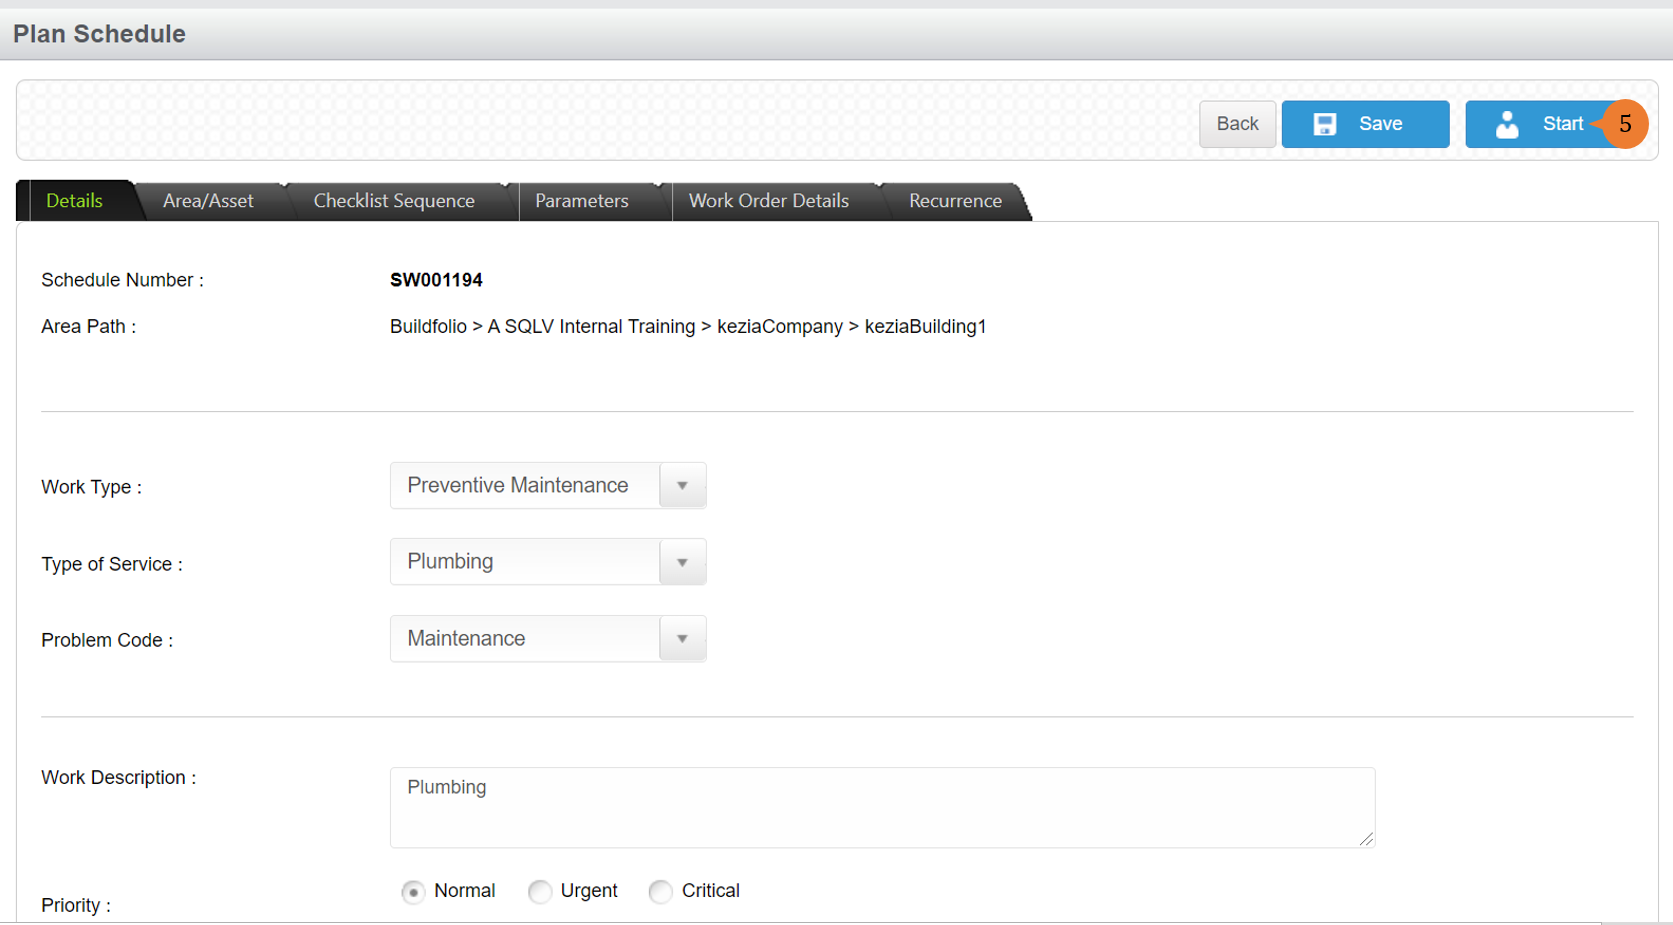
- When the Schedule is successfully started, a success message will appear below the page title.

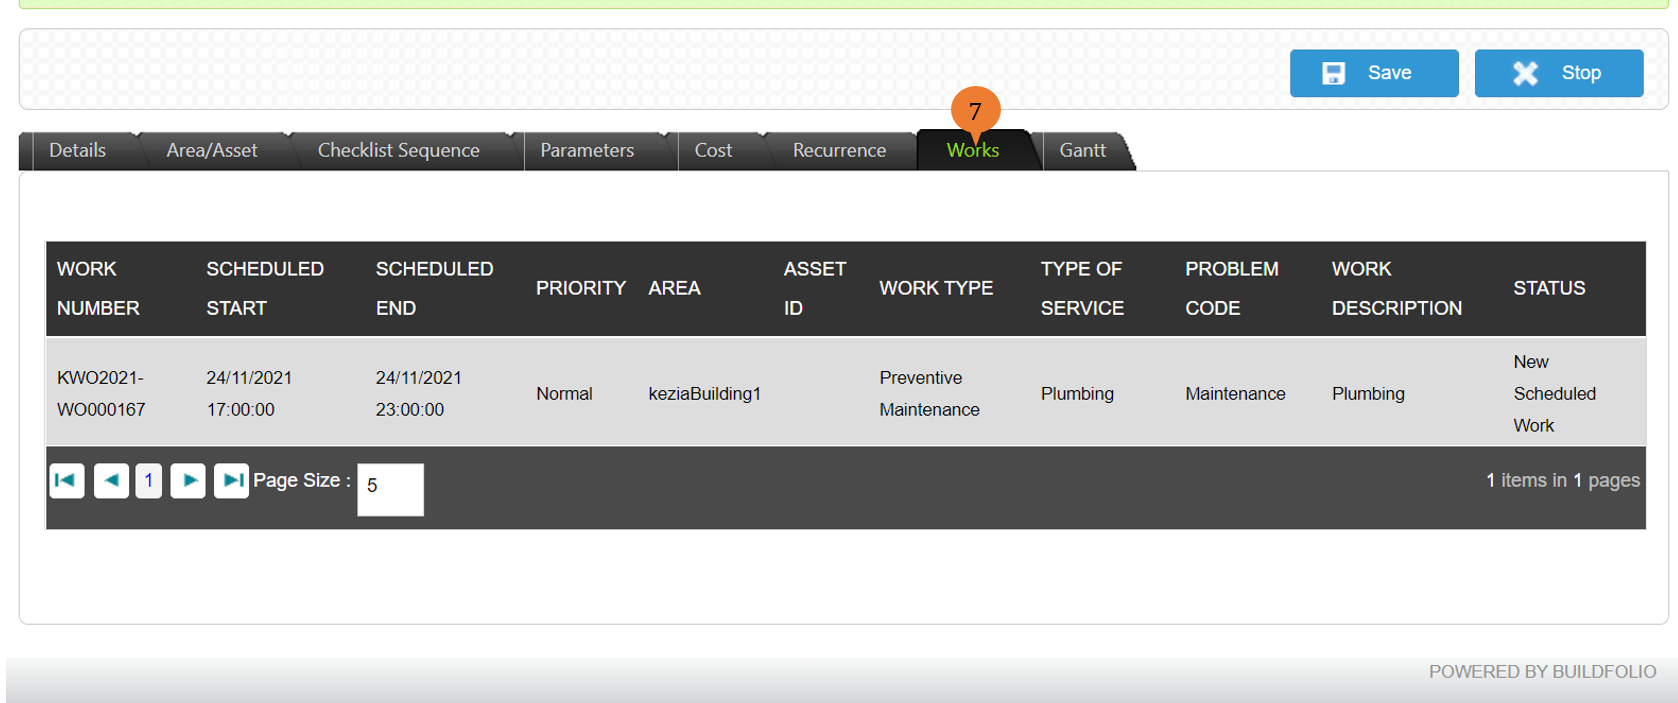
- In the Works tab, it will show the list of scheduled work orders that have been created.
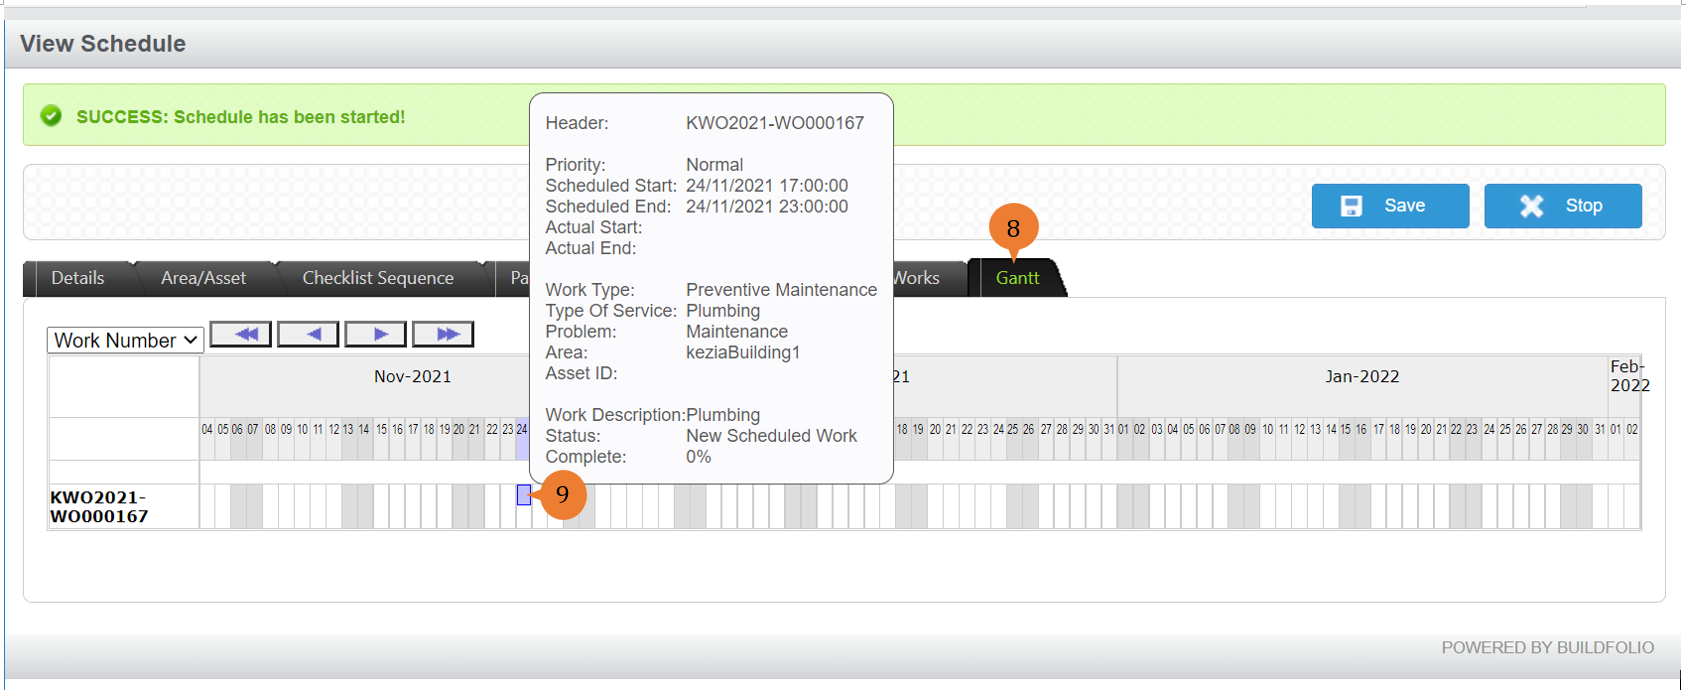
- In the Gantt tab, it will show the list of scheduled work orders that have been created in the calendar view.
- To view the detail of the work order, point your mouse on the Purple tab in the calendar view.
More on this topic
- For a step-by-step guide to Editing the Schedule that you have Added, see How to Edit a Schedule?
- For a step-by-step guide to Stopping the Schedule that you have Started, see How to Stop a Schedule?
- For more step-by-step guides to using Work Order Management module, see Work Order Management Module.
- Under the Recurrence tab, to set the frequency of the preventive maintenance scheduled, select your preferences for how subsequent Work Orders will be created.