How to create Contract?
Jump to
How to create Contract on the web browser?
Note: This is usually created by the procurement team. The system sends reminder and expiry notifications to the Contract Manager.
To create a new Contract
- Select Add Contract under Vendor & Contract Management from the Menu.
- Select the organization or area that the rate book is for.
- Click on Add Organization/Area button to add the selected organization/area.
- A successful message will be shown and the organization/areas added will be reflected.
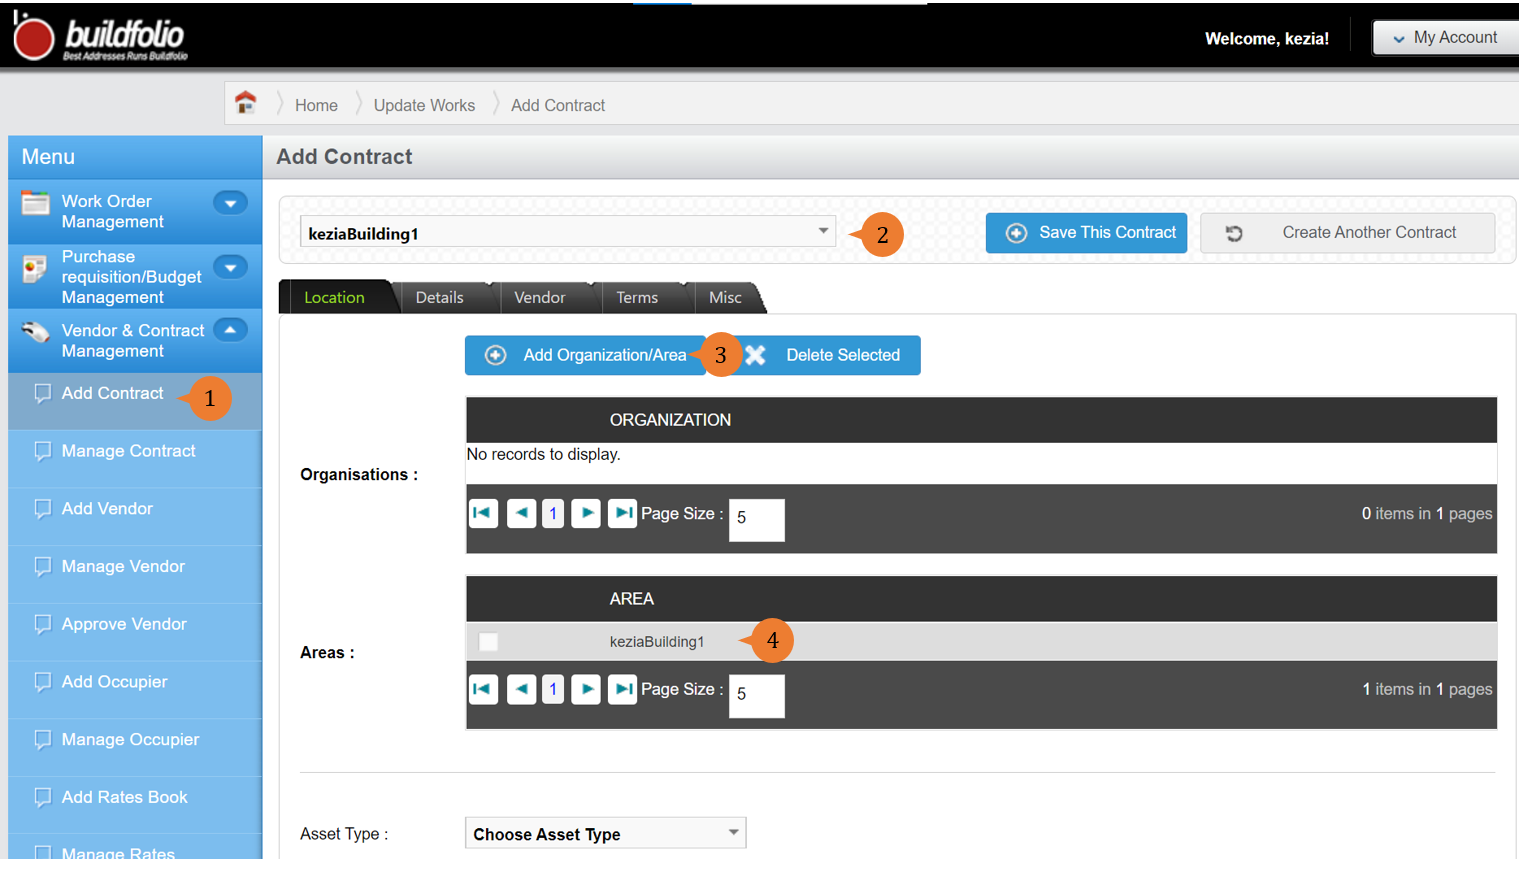
-
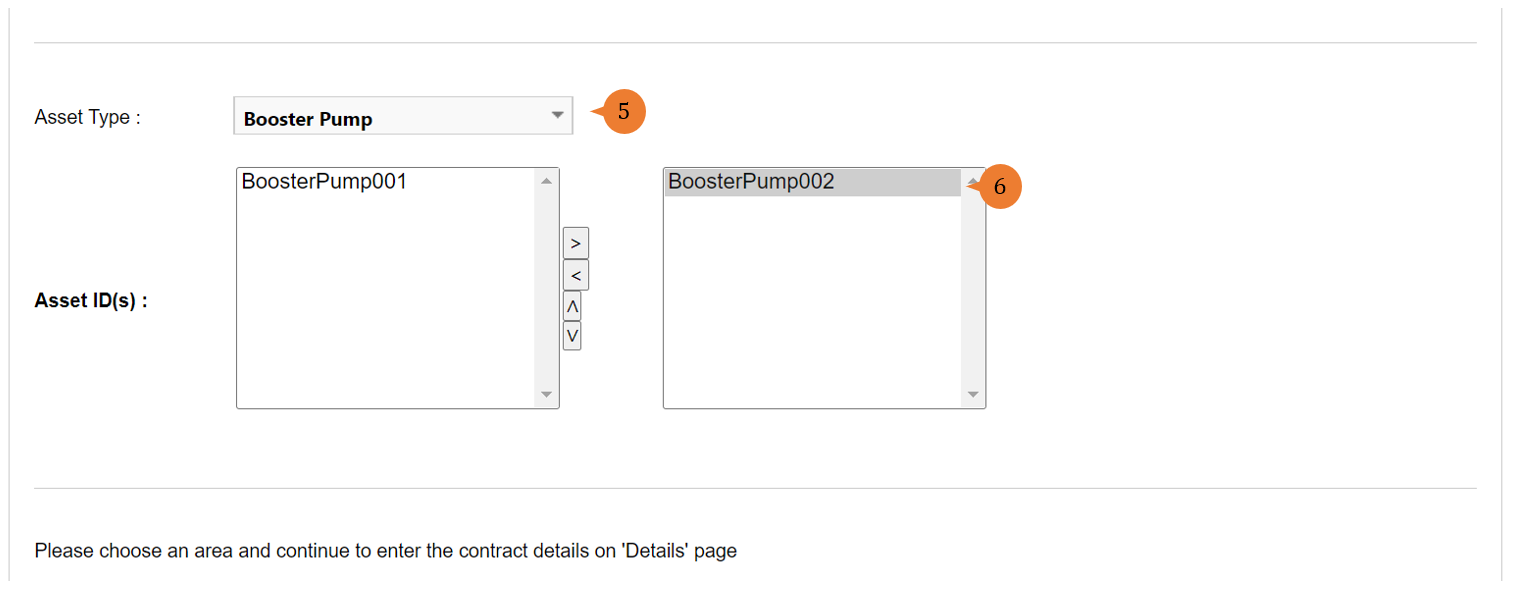
- If the contract is to manage a certain asset type, select the respective asset type for the system to retrieve the list of the relevant assets in the chosen organization/area.
- Should the contract only maintain certain assets in the building due to service specialization, select the respective asset ID to be added by clicking on the arrow to include.
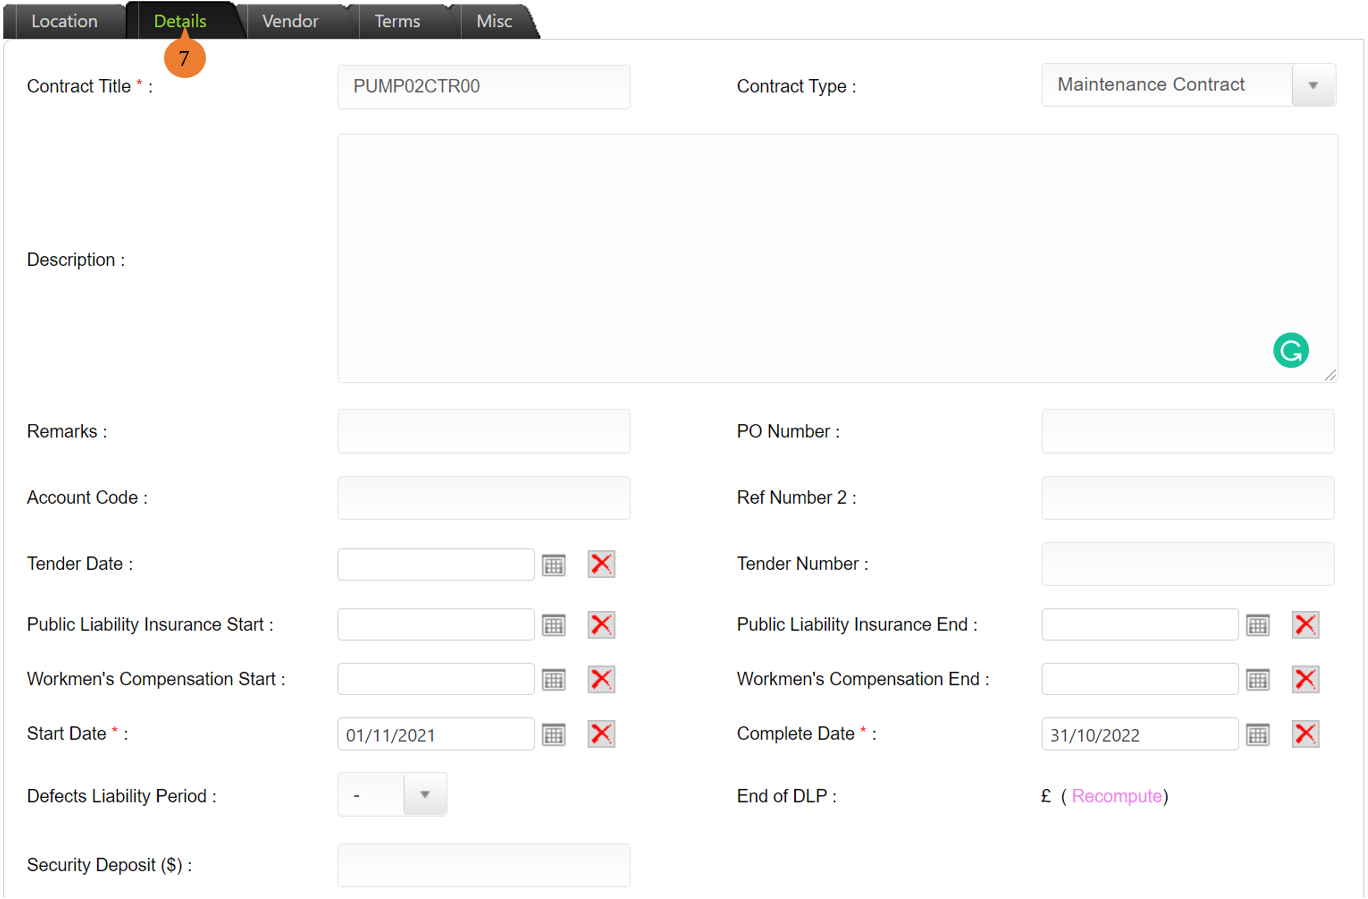
- In the Details tab, fill in the compulsory fields marked with *.
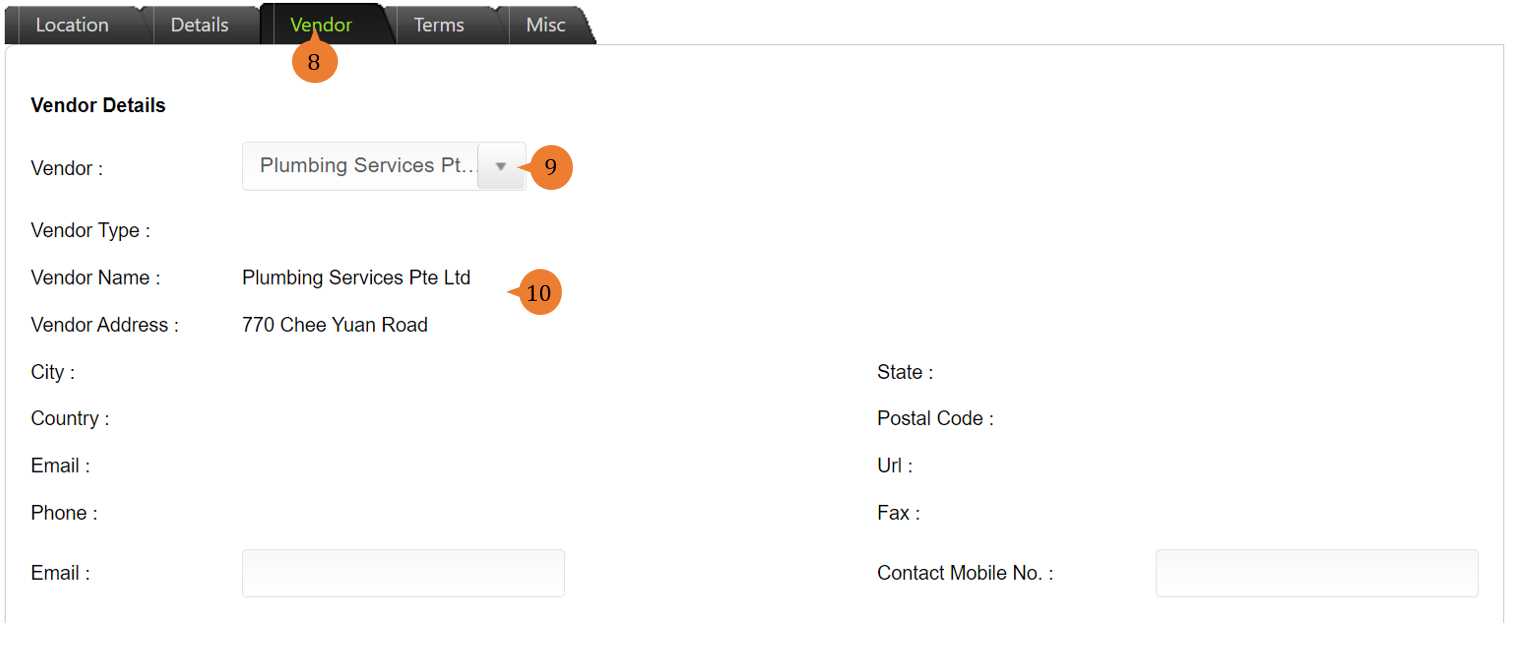
- Click on the Vendor tab.
- Select the vendor involved in this contract from the list of vendors in the system.
- Once the vendor is selected, the vendor’s information will be populated.
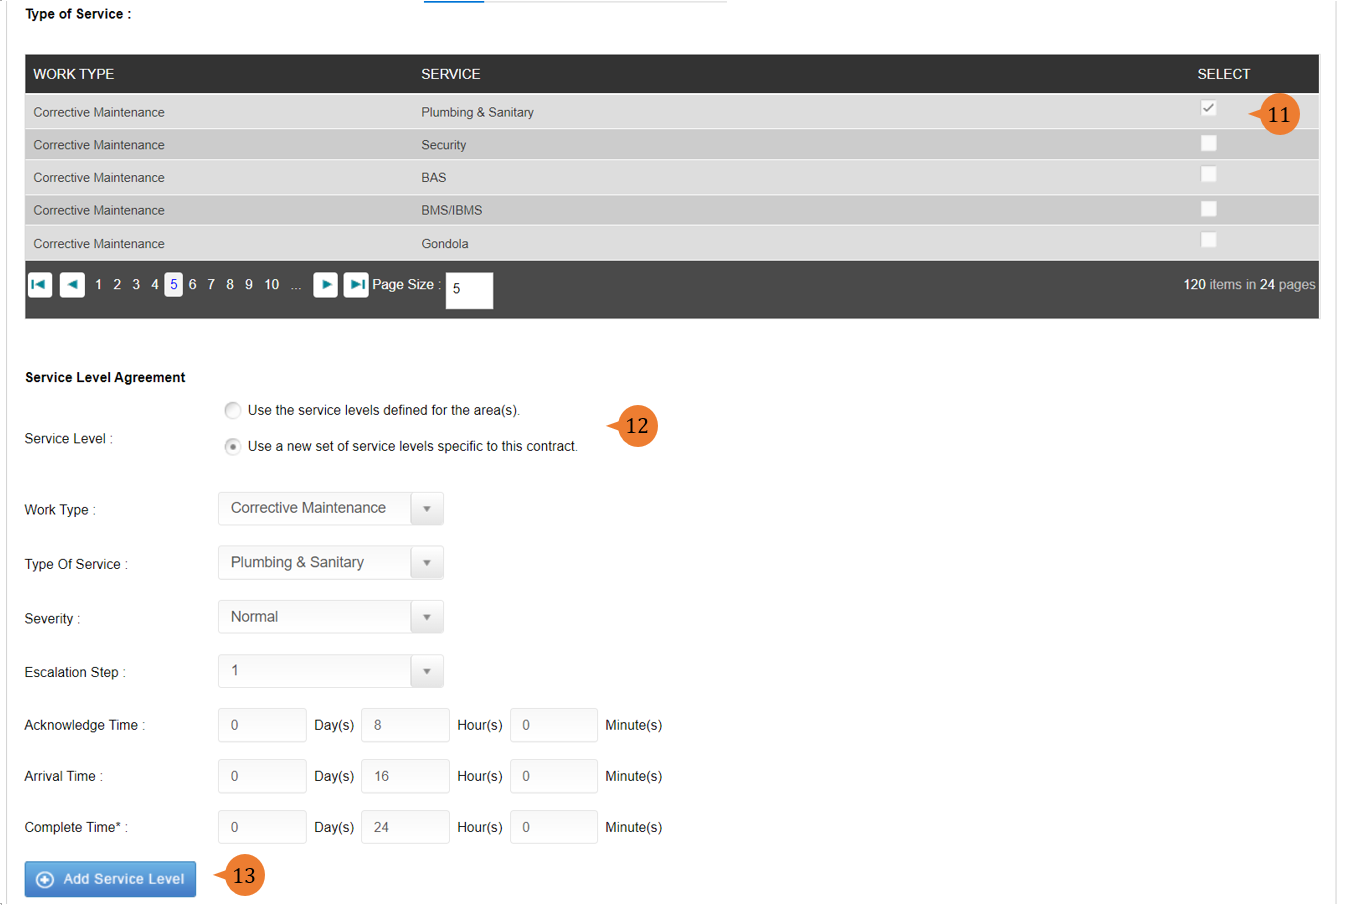
- Select the Type of Service that the vendor must perform under this contract by ticking the box.
- Under the Service Level Agreement, select either whether to use the Service Levels defined for the area or use a new set of service levels specific to this contract.
- If a new set of service levels specific to this contract choice is selected, indicate the service level by and then click on Add Service Level button.
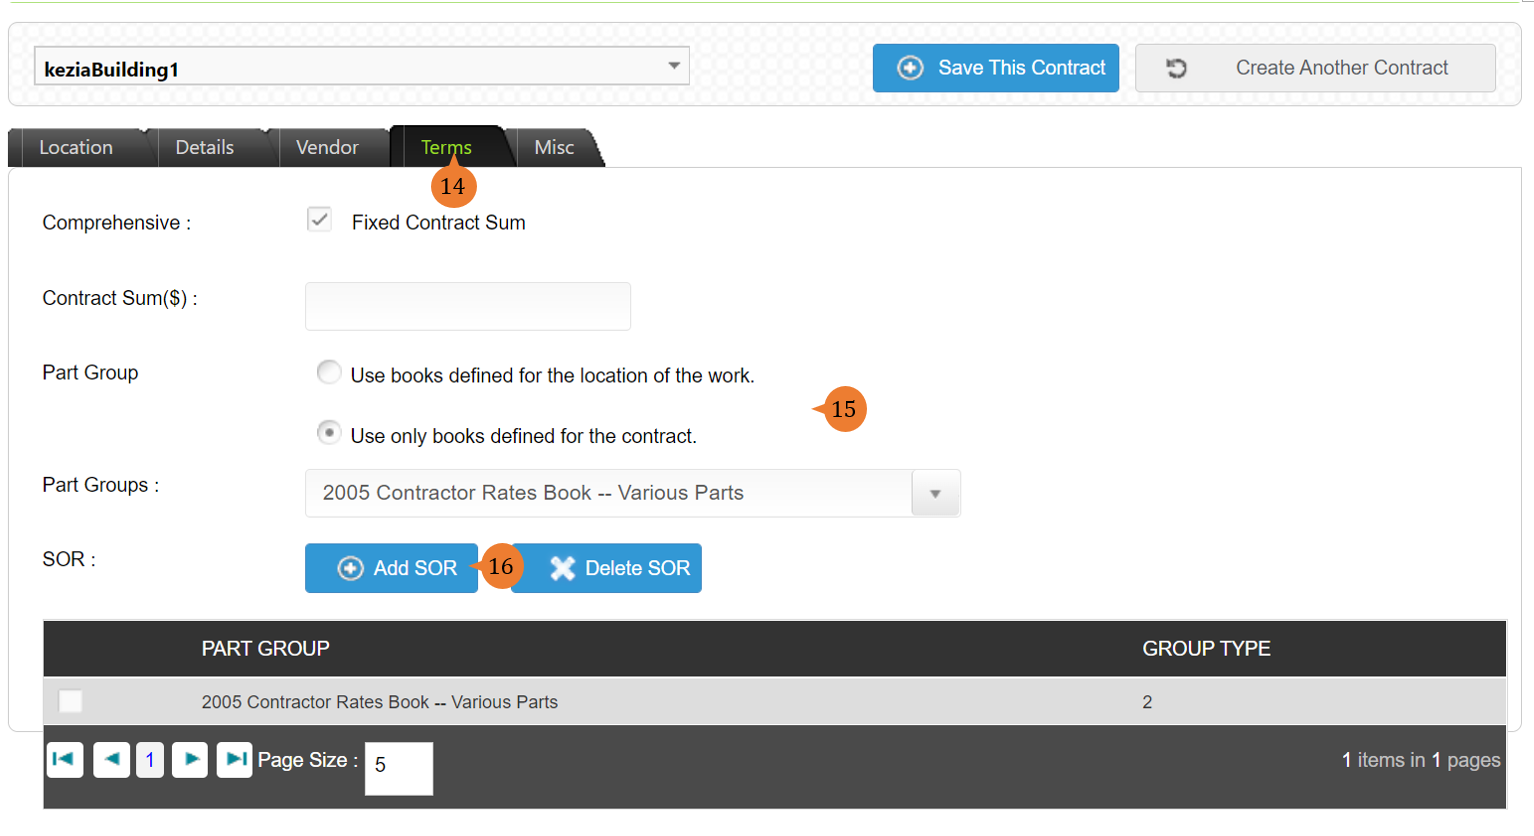
- In the Terms tab, input the contract sum and association to any rates book.
- In the Part Group, select to use rates book based on location or specific for this contract.
- If the rate book is specific for this contract, need to select the respective rate book and click on Add SOR.
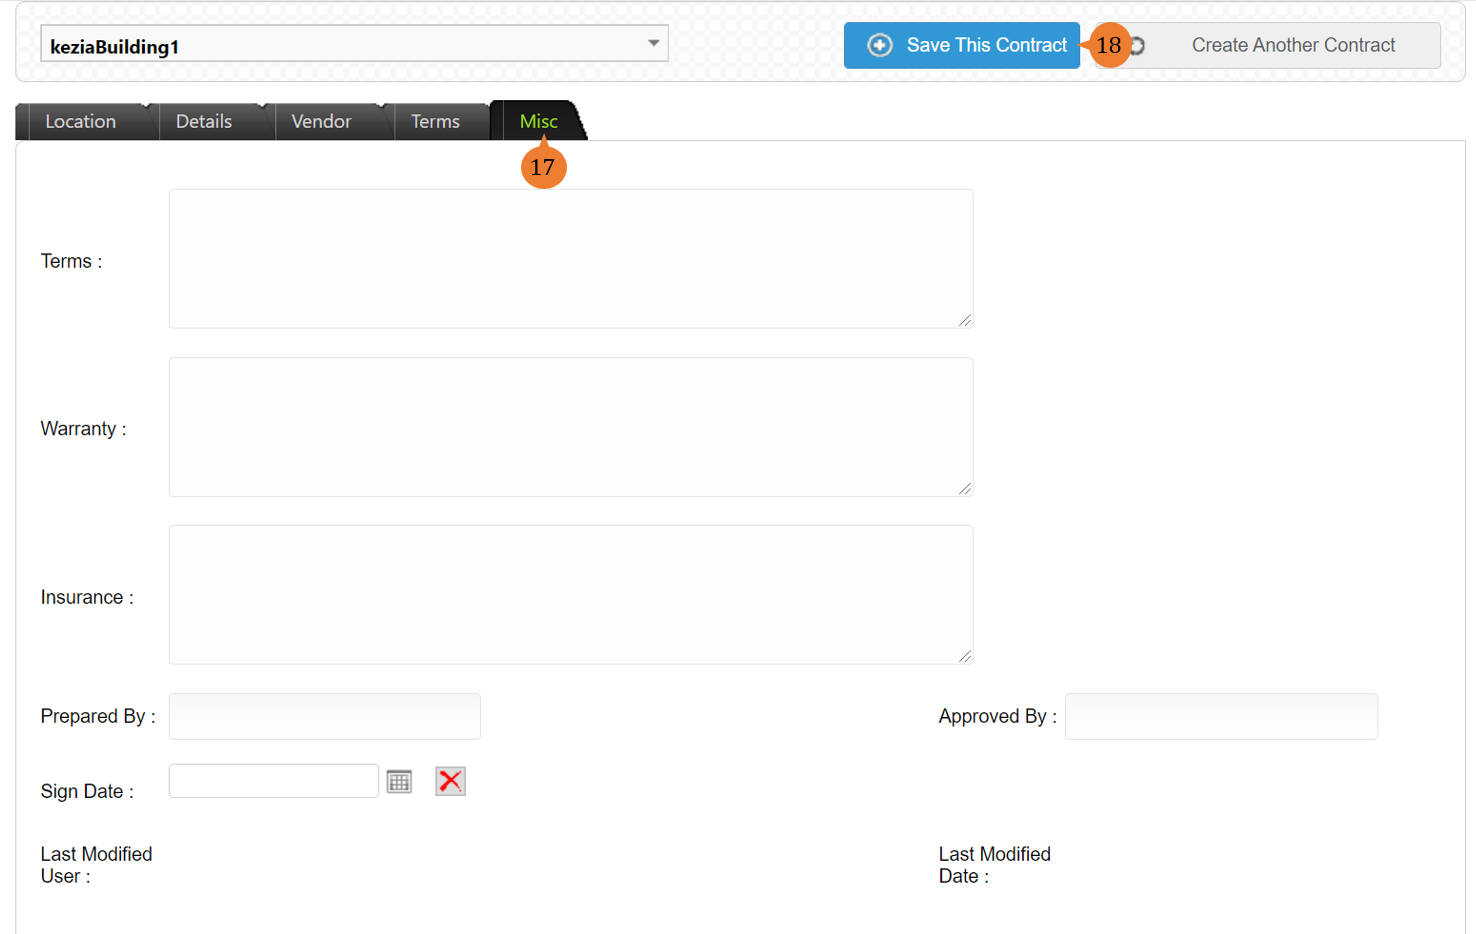
- In the Misc tab, fill in the necessary fields for information purposes.
- To save all the information of the contract, click on Save This Contract button.
- Once the contract is created, a successful message will appear under the header.

More on this topic 
- For a step-by-step guide to manage the contract, see How to manage contract on the web browser?.
- For step-by-step guides to using Vendor & Contract Management module, see Vendor & Contract Management Module.